Let’s get started by following this guide
Once you’ve selected the Favizone Product Recommendations solution for your website, the installation is a simple one-click step, and Shopify will redirect you to the standard module installation page.
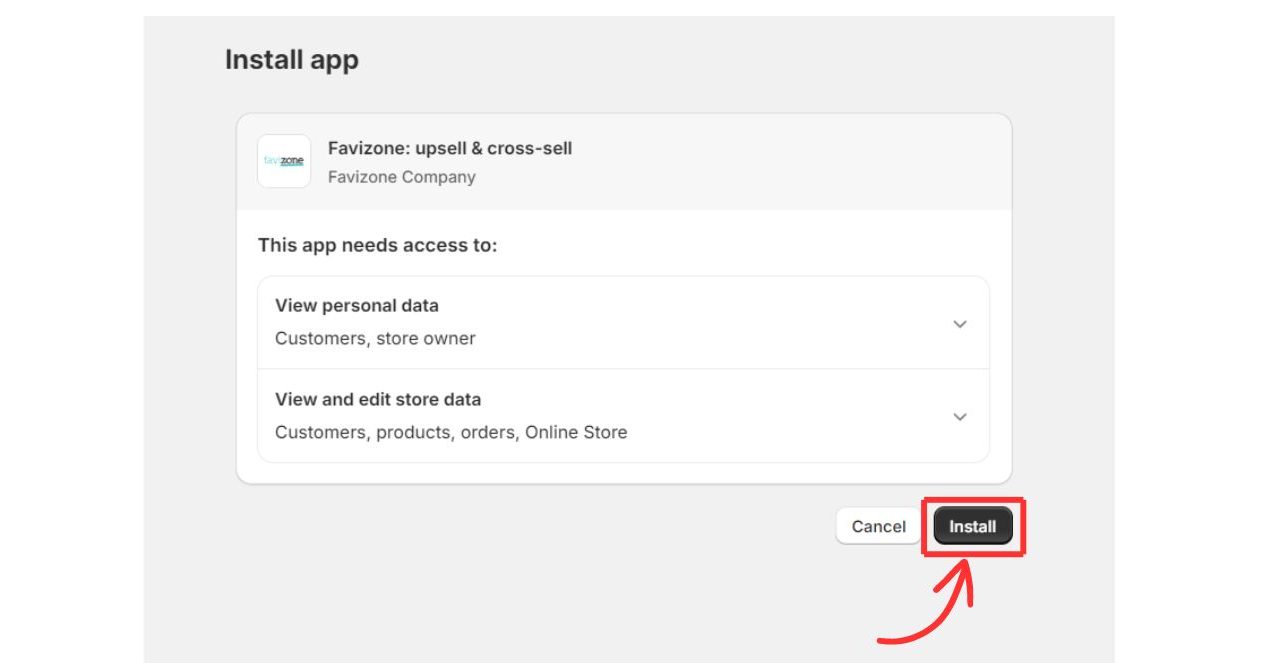
1.App Installation
To install the app, just click on the “Install” button.
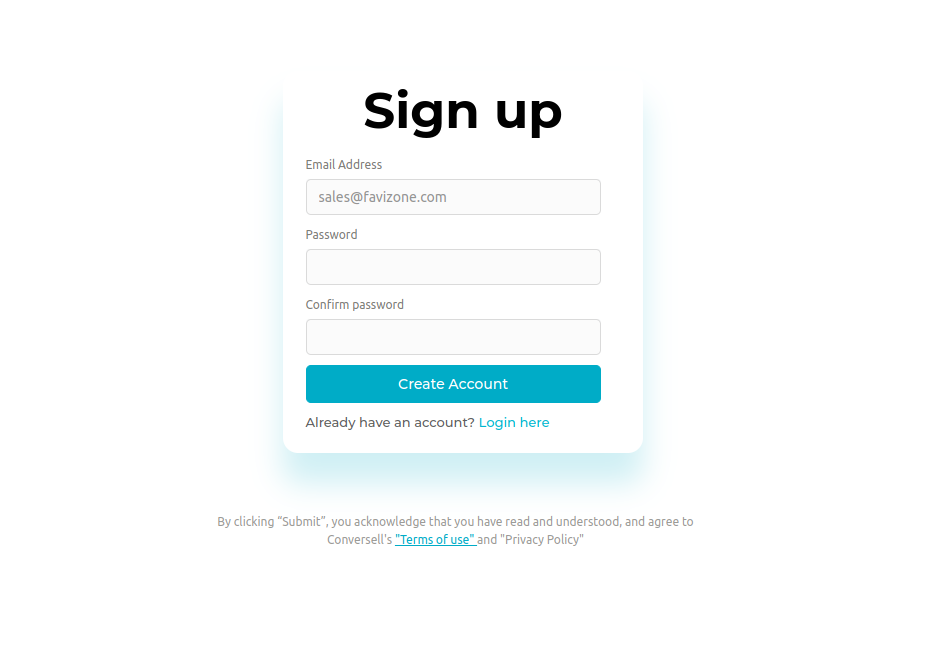
After the installation is completed, if you are not already a Favizone user, you will be directed to sign up for a new account. Fill in the required information.
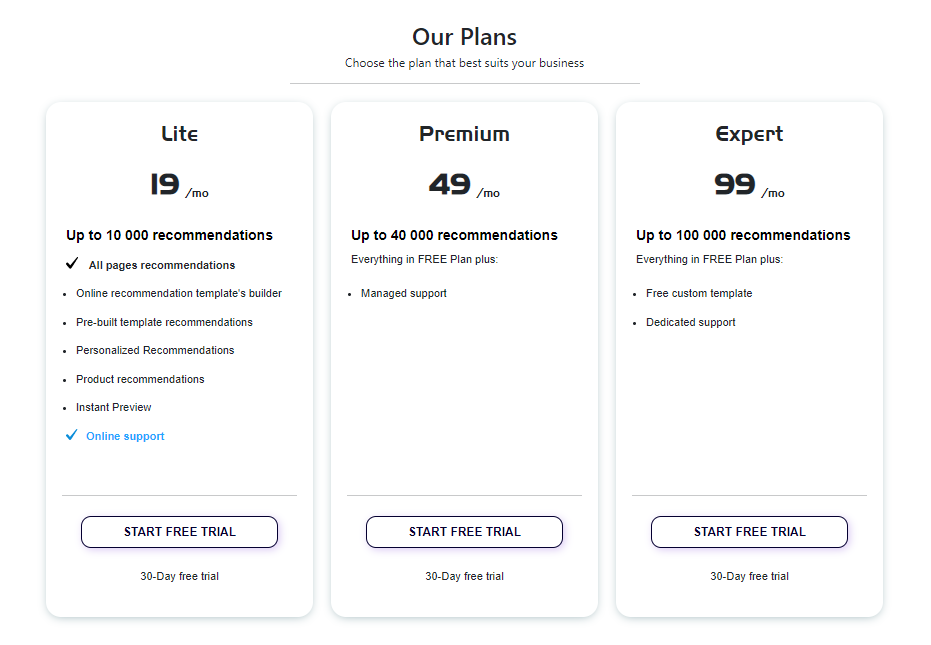
You will be prompted to the payment plan page, where you can select a pricing strategy that suits your business needs and budget. You can always start your free trial today and then upgrade later to keep enjoying the benefits of Favizone Product Recommendations.
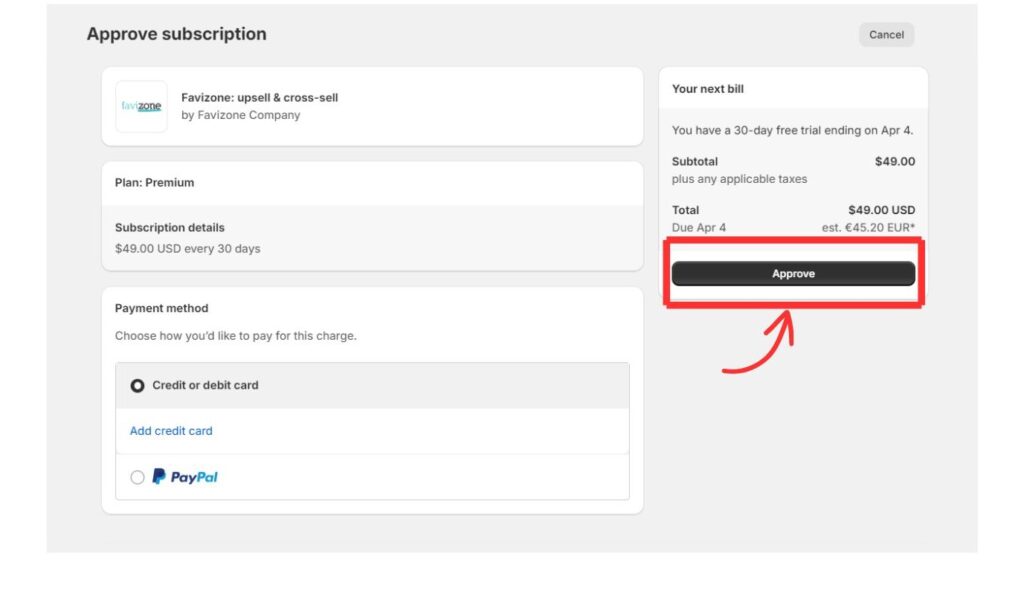
After selecting your plan, you should be redirected to Shopify’s back office to approve your subscription.
2. Shop configuration
Now that you have installed the Favizone Product Recommendations module, there are additional modifications that need to be made to your Shopify store in order to integrate the recommendations.
2.1 Explaining App Blocks and App Embed Blocks
Shopify introduced two powerful features: App Blocks and App Embed Blocks for enhanced functionality and customization for your store.
App Blocks are customizable content blocks used to enhance a Shopify store’s design and functionality without advanced coding skills. App Embed Blocks are custom applications integrated into the Shopify admin for streamlined workflows and personalized store functionality.
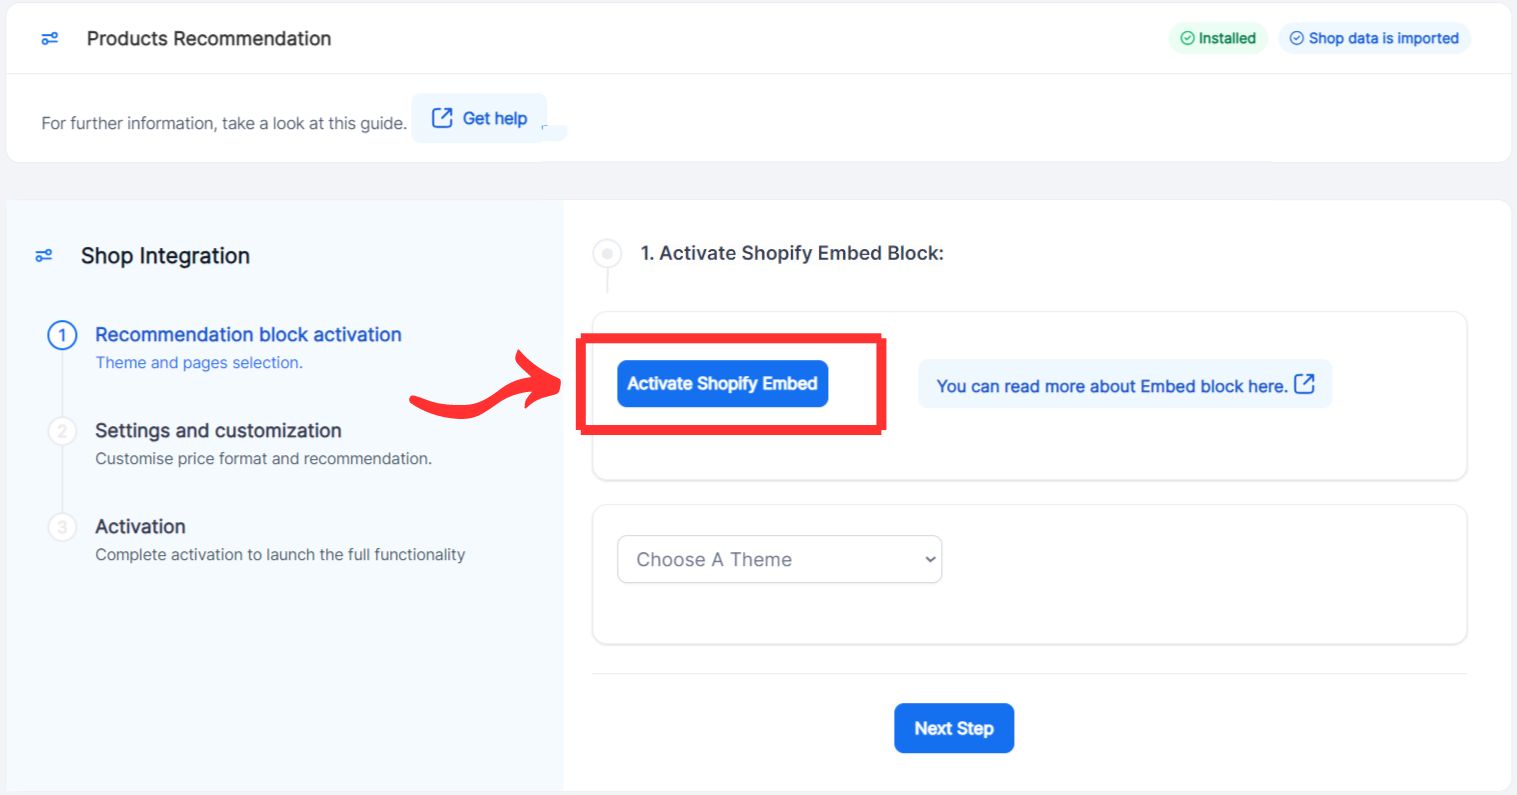
2.2 Activate Shopify Embed Block
After selecting your plan, you should find yourself on the “Shop Integration” page. Click on “Activate Shopify Embed.”
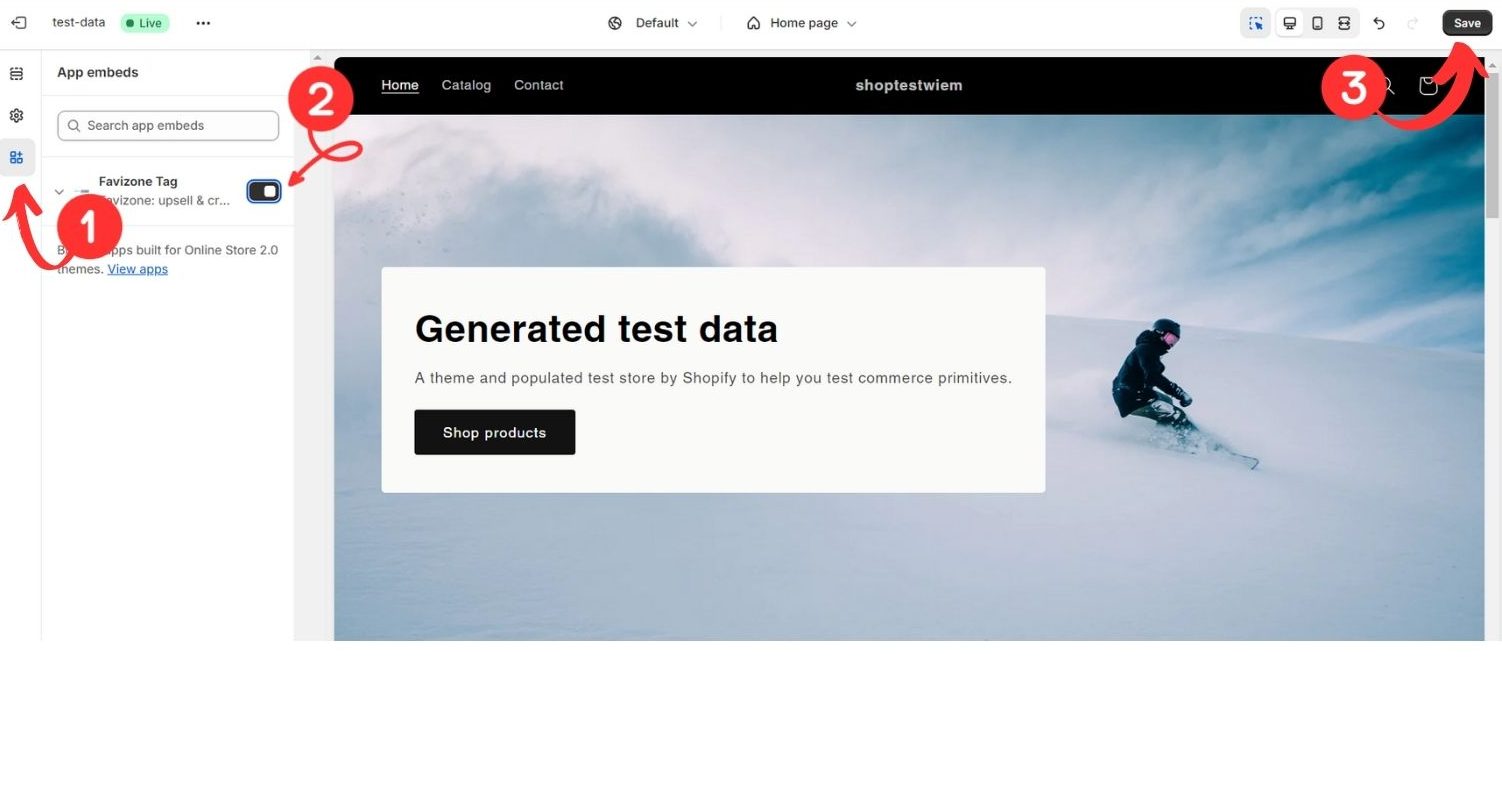
Please verify that the Favizone tag is activated, and remember to save your changes.
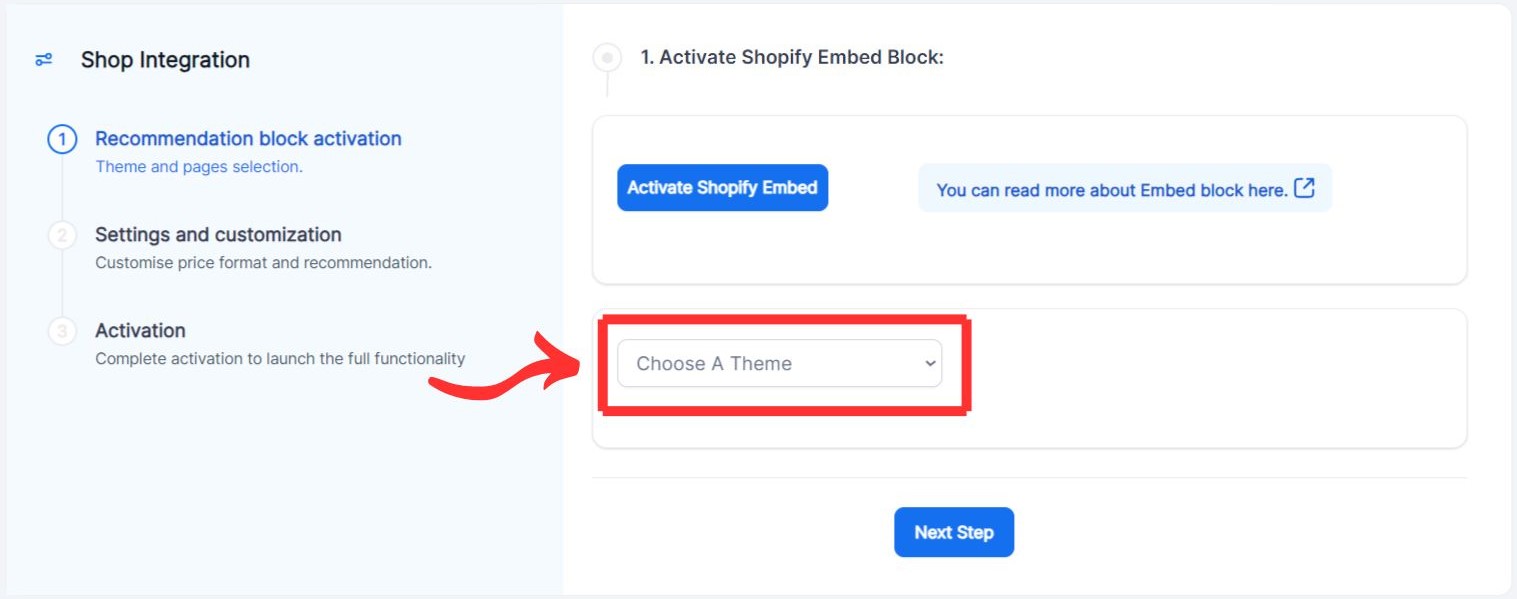
Next, you can select your Shopify store theme.
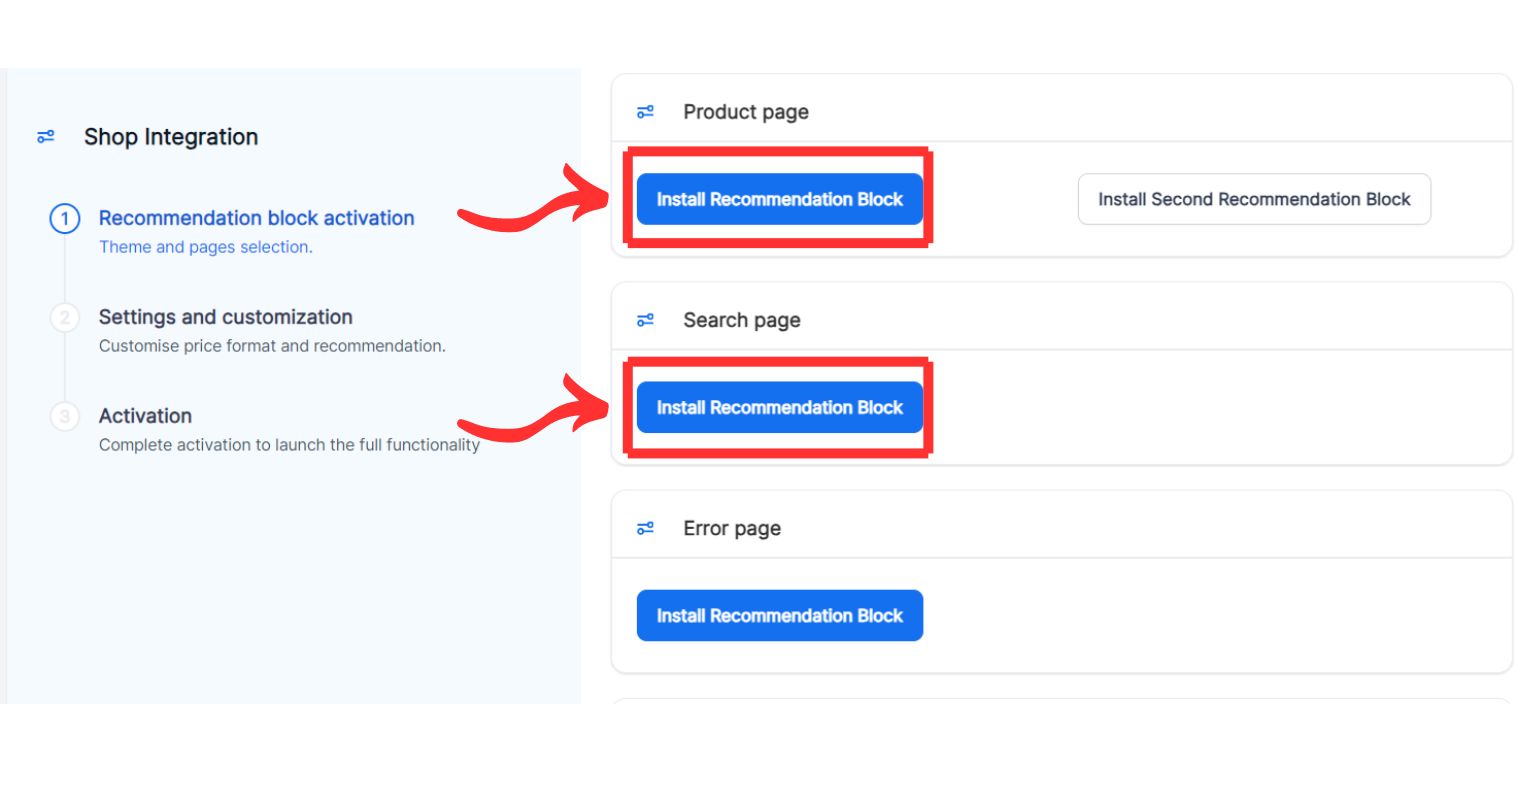
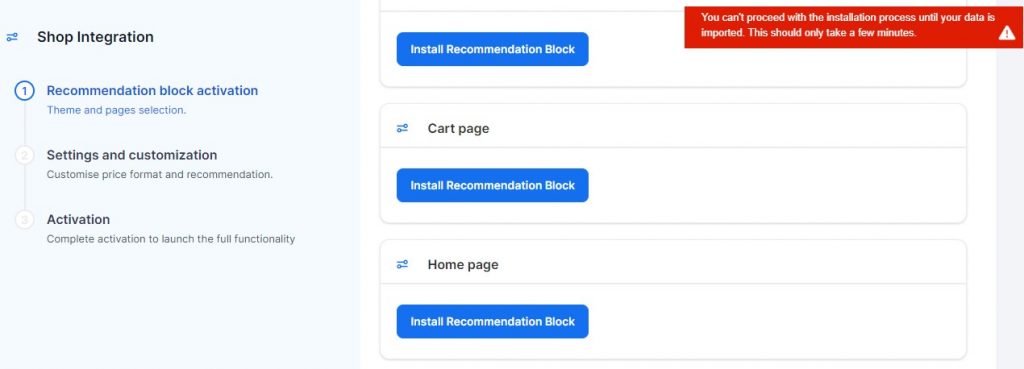
2.3 Install Recommendation App Blocks on All Pages
You can now activate the recommendation blocks on any page you want the recommendations to be displayed in.
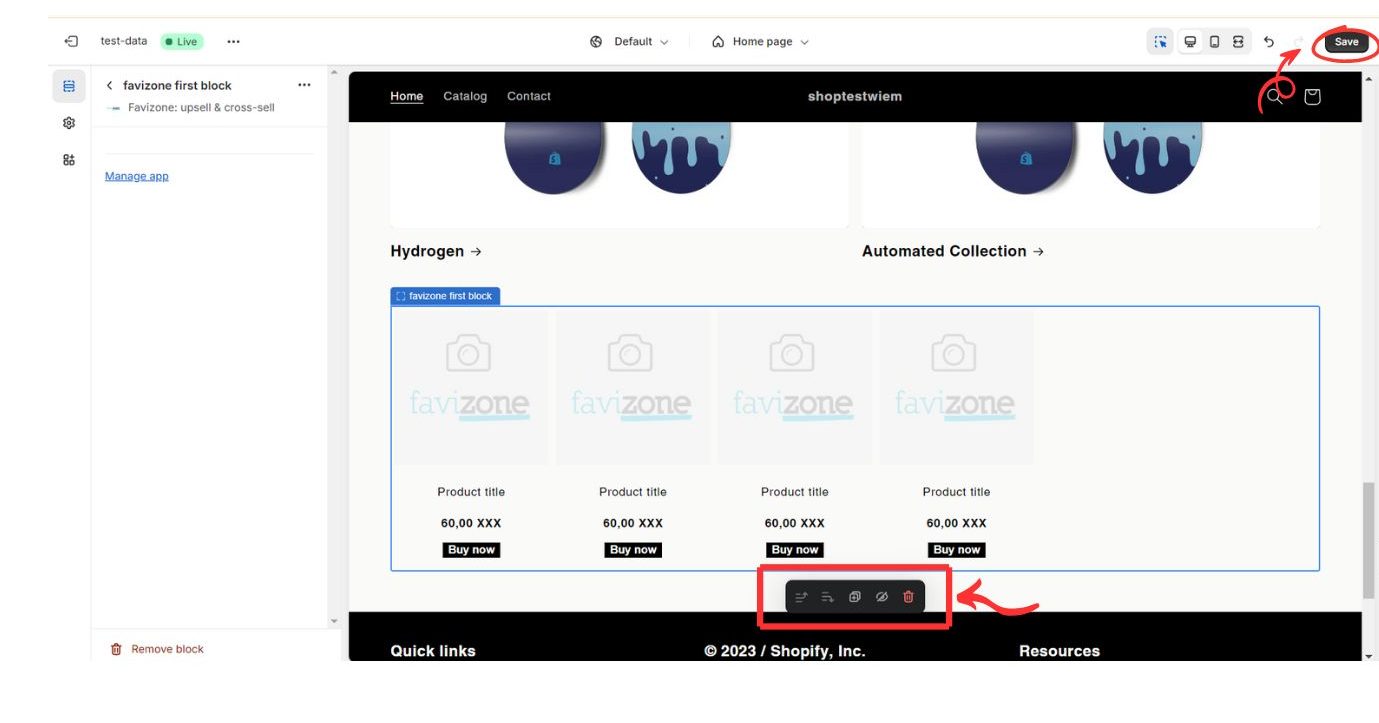
Once you click the button, you should be taken to your Shopify’s shop back office, and you should be given a preview of the recommendations. You can manipulate the recommendation block and position it as you like.
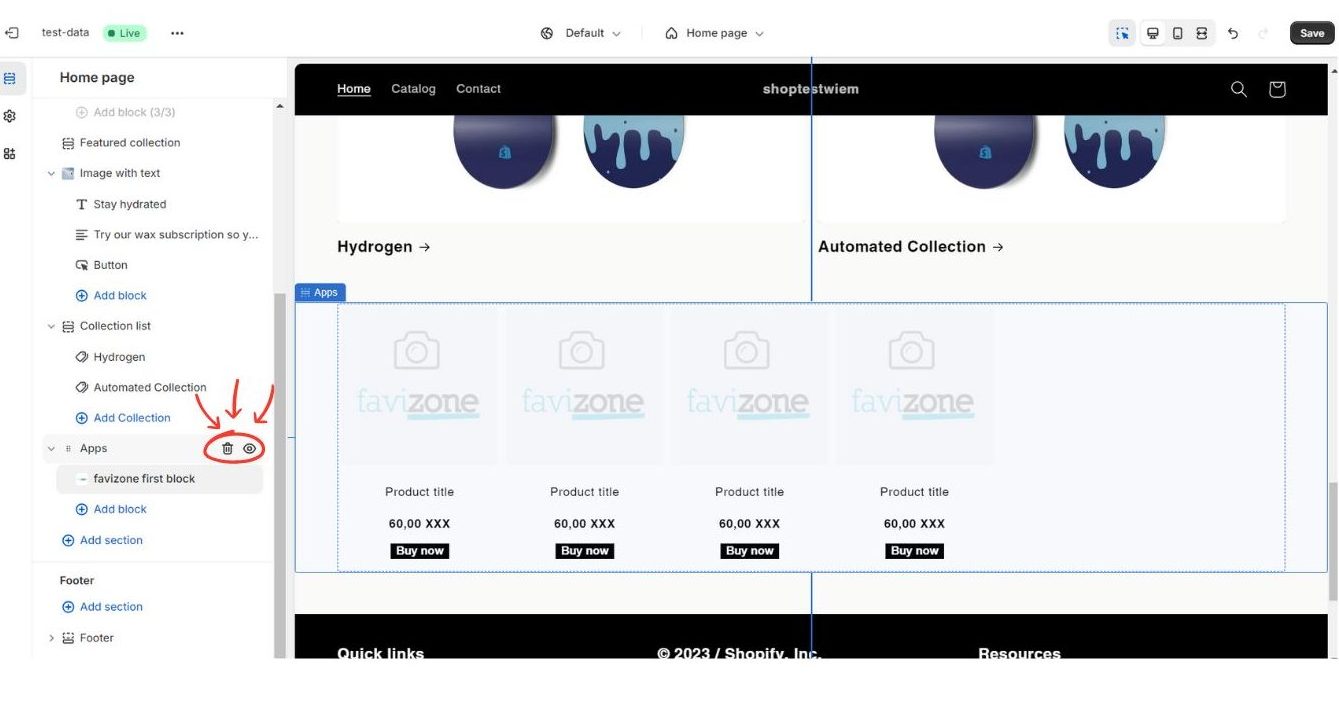
You can duplicate or delete any block that you want. Please click “Save” to finalize the recommendation location.
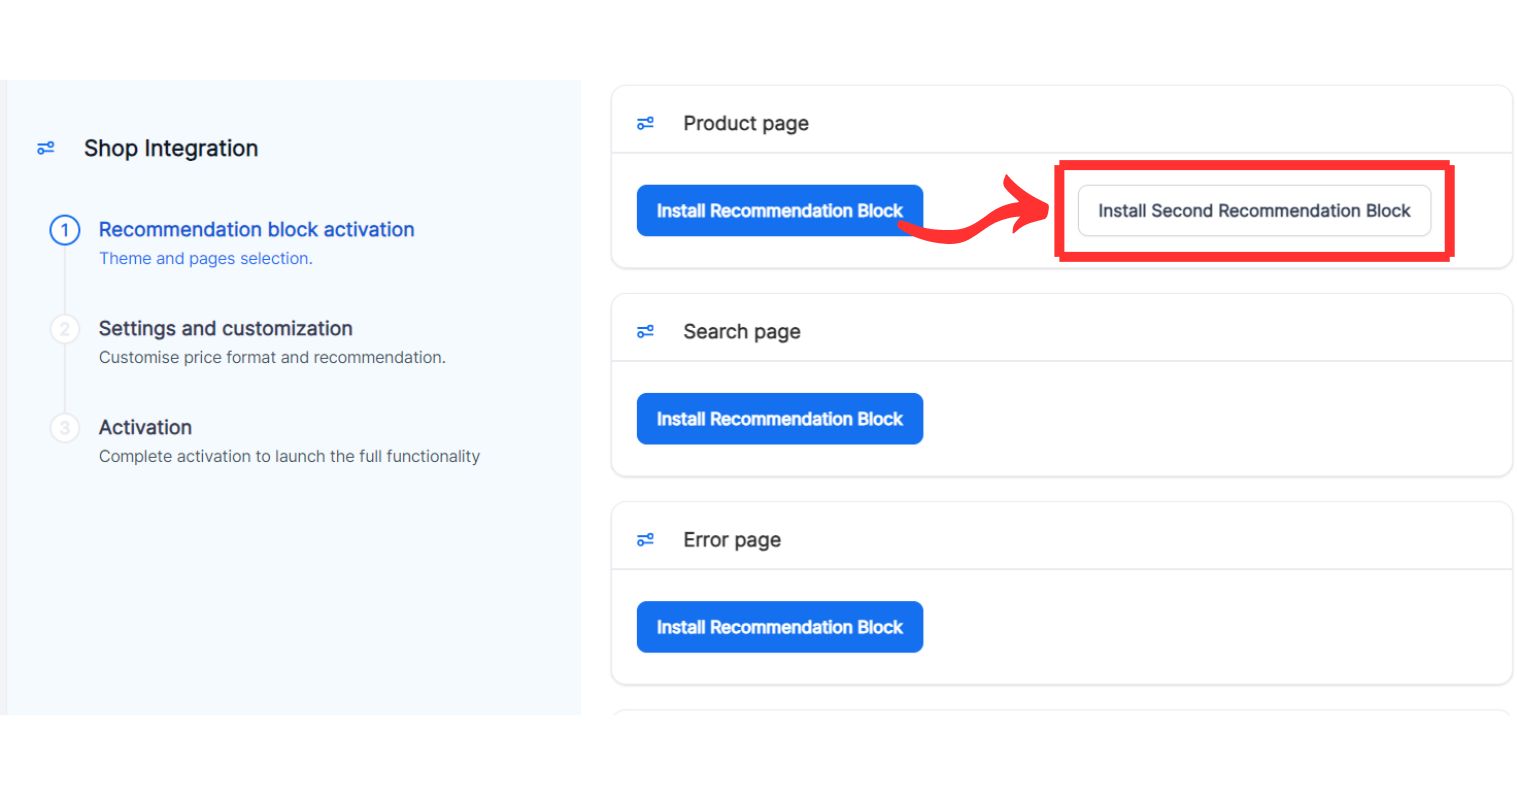
You should take the same steps for the activation of the second recommendation block.
Please do this for all the pages you wish the recommendations to appear in. Don’t forget to “Save” your changes before you exit.
If you couldn’t find Favizone Blocks, don’t worry; we have the correct steps for you.
If you didn’t, then this step is for you.
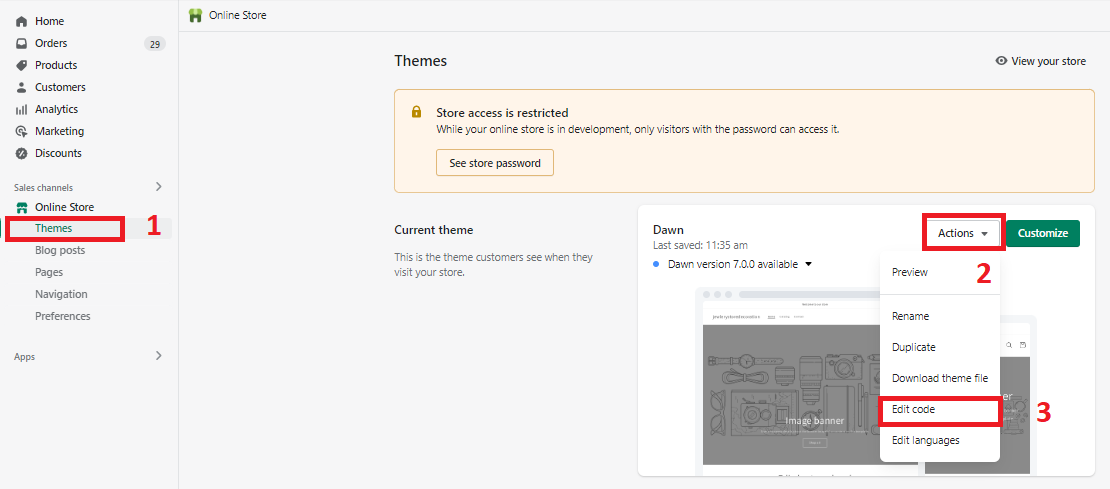
First, we go back to the back office of the shop and select the theme we want to modify.
Click on Action > Edit code
Let’s start with the index page
On the left menu, we select index page inside Templates folder.
Make sure to select Index.liquid page from Templates section.

Index.liquid
Once you are inside the page you want to modify, you need to add this syntax <div id=”favizone_home_top_element”><div> , so that Favizone can identify the precise location at which you wish to present the recommender.
The same concept can be applied to spawn the recommender on any page you like.
Here is a list of the pages and the tags you can add to your shop.
Position the divs carefully on the page to move the recommander in the page.
Now we repeat the same thing for the other pages to get actions.
2.4 Install Recommendation App Blocks
With the integration of our powerful AI technology, customers will now receive a personalized recommendation list of items during the checkout process that is tailored to their preferences and interests.
Once all the recommendation blocks are activated, you need to wait until your shop data is imported.
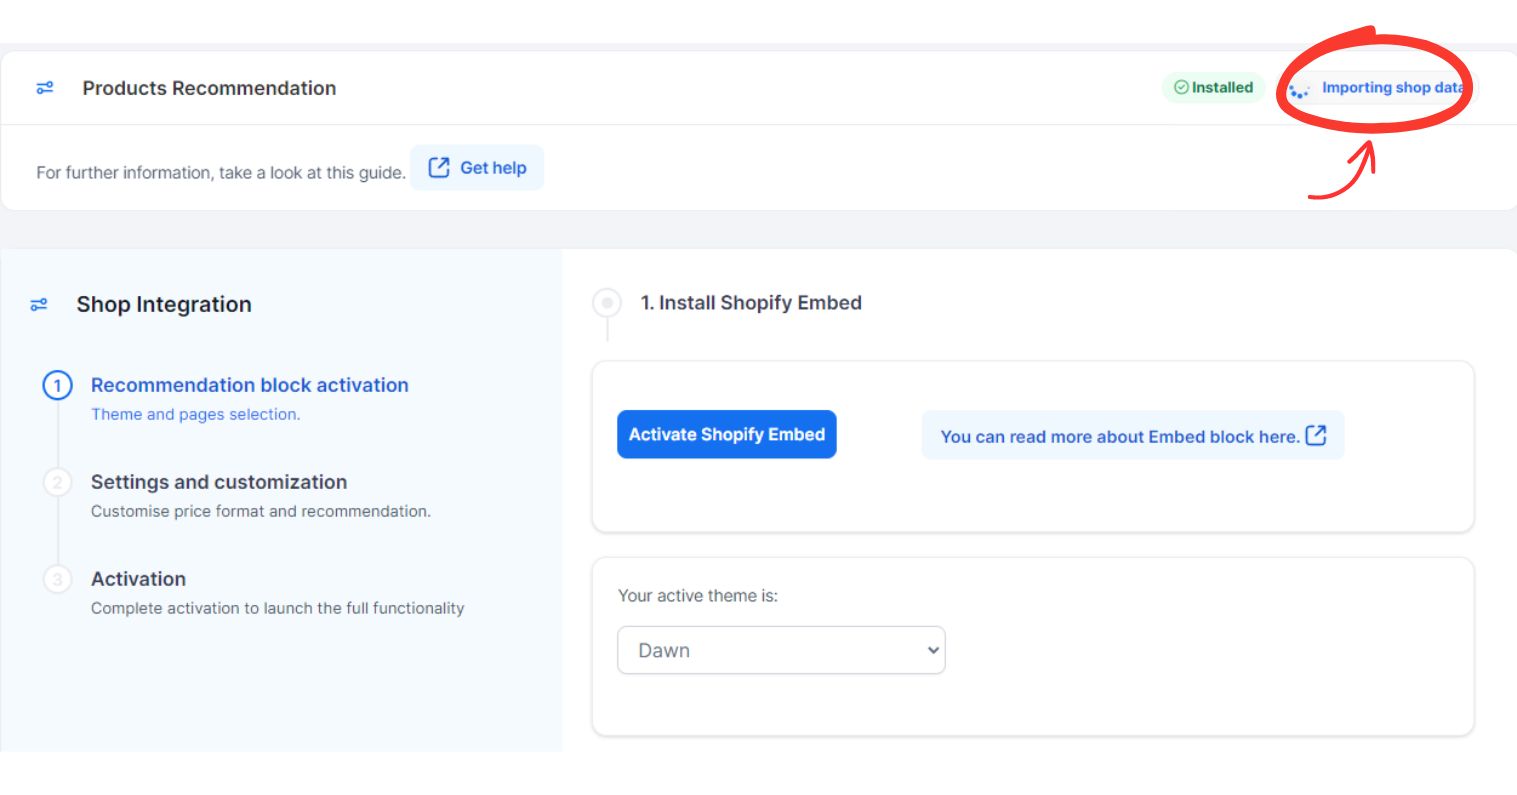
You can’t proceed with the installation process until your shop data is imported. This should only take a few minutes.
When your data import is complete, you can click on “Next Step” to proceed to the Settings and customization step.

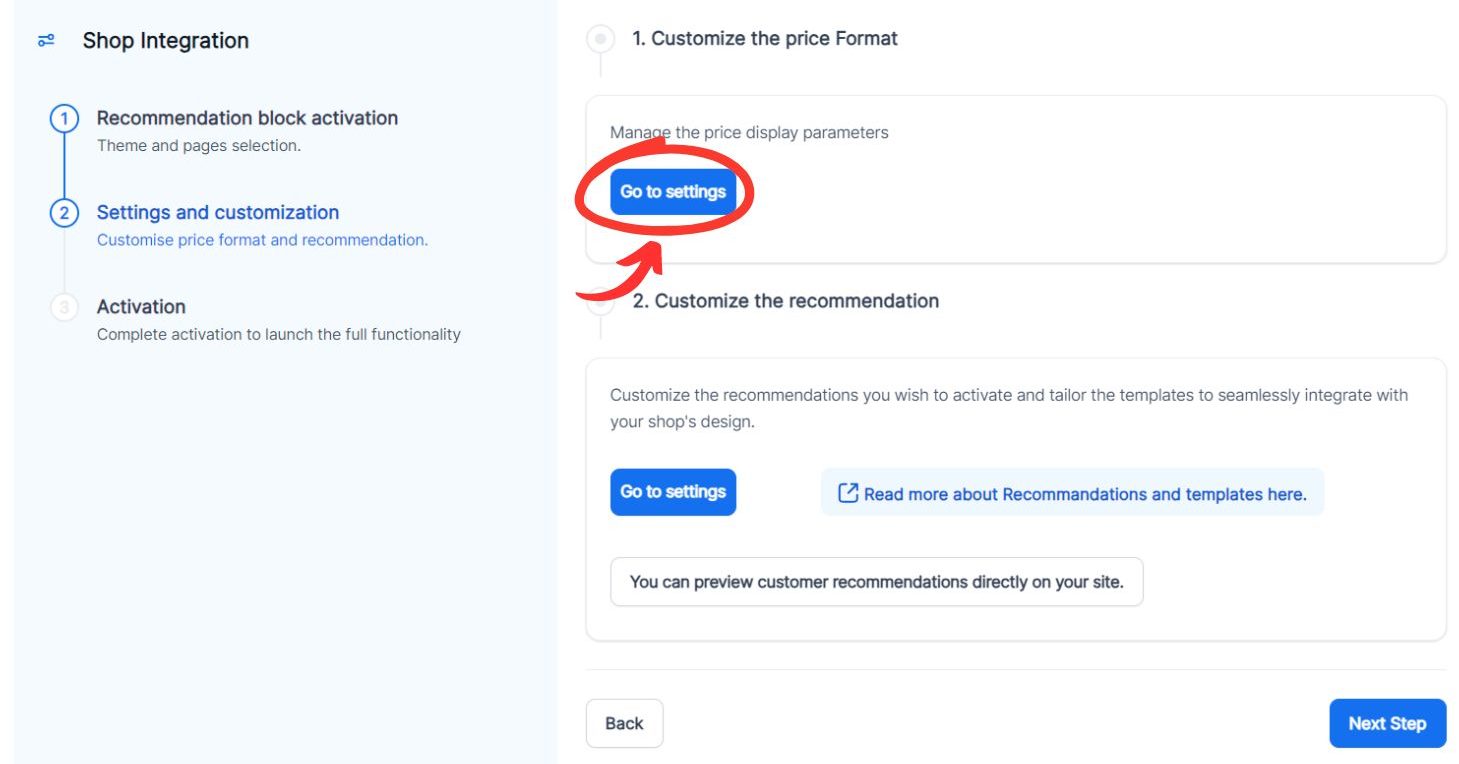
2.5 Settings and Customization
You can now customize the price format and recommendations in your store.
You can adjust your currency parameters and your general preferences.
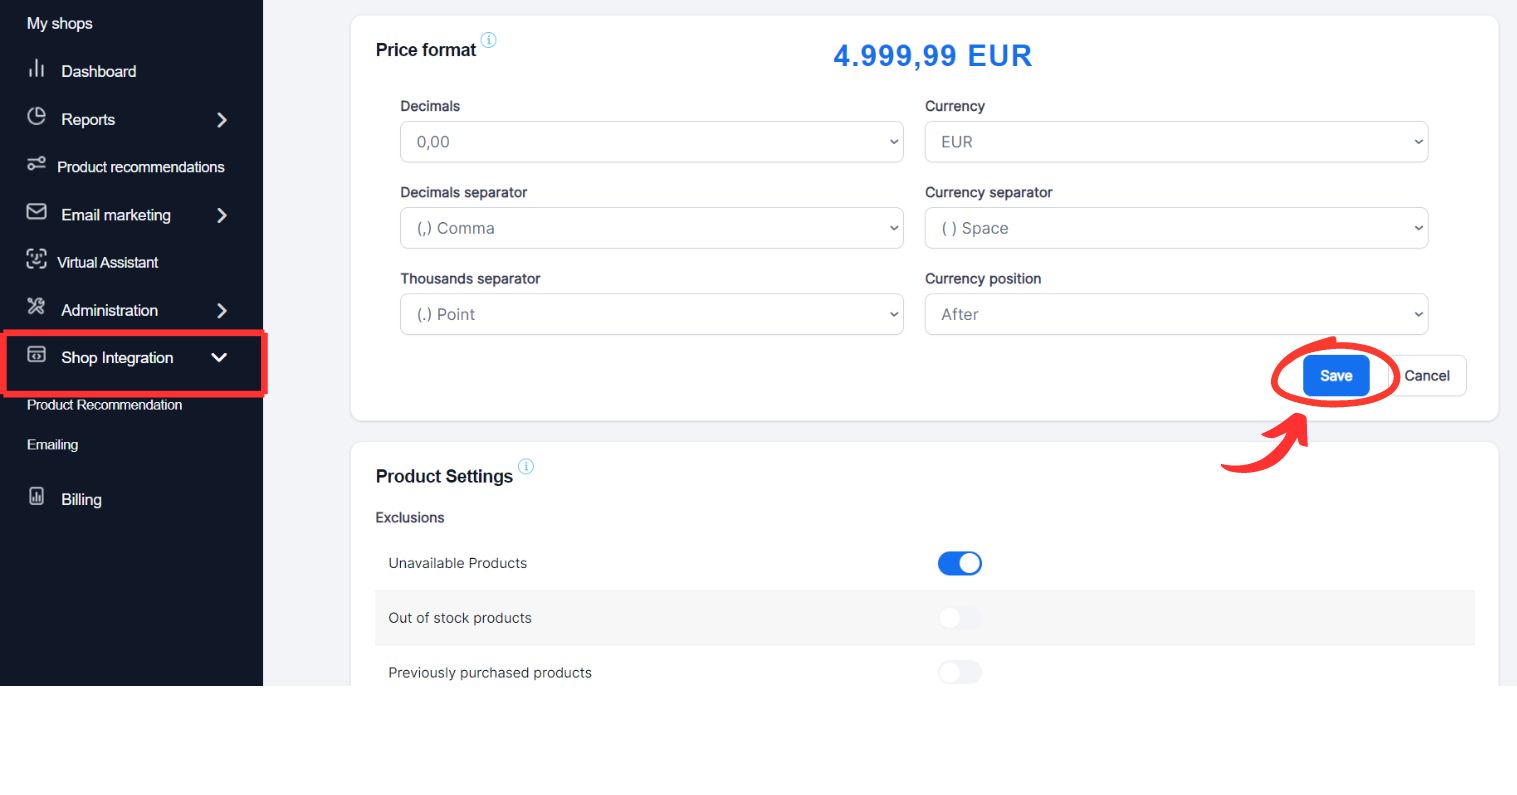
Don’t forget to click “Save” in order to save your changes.
You can always go back to the installation process from the shop integration button on the side menu.
After you finish the settings, you can go back to the Shop Integration tab and continue the installation.
Next, you can customize the recommendations you wish to activate.
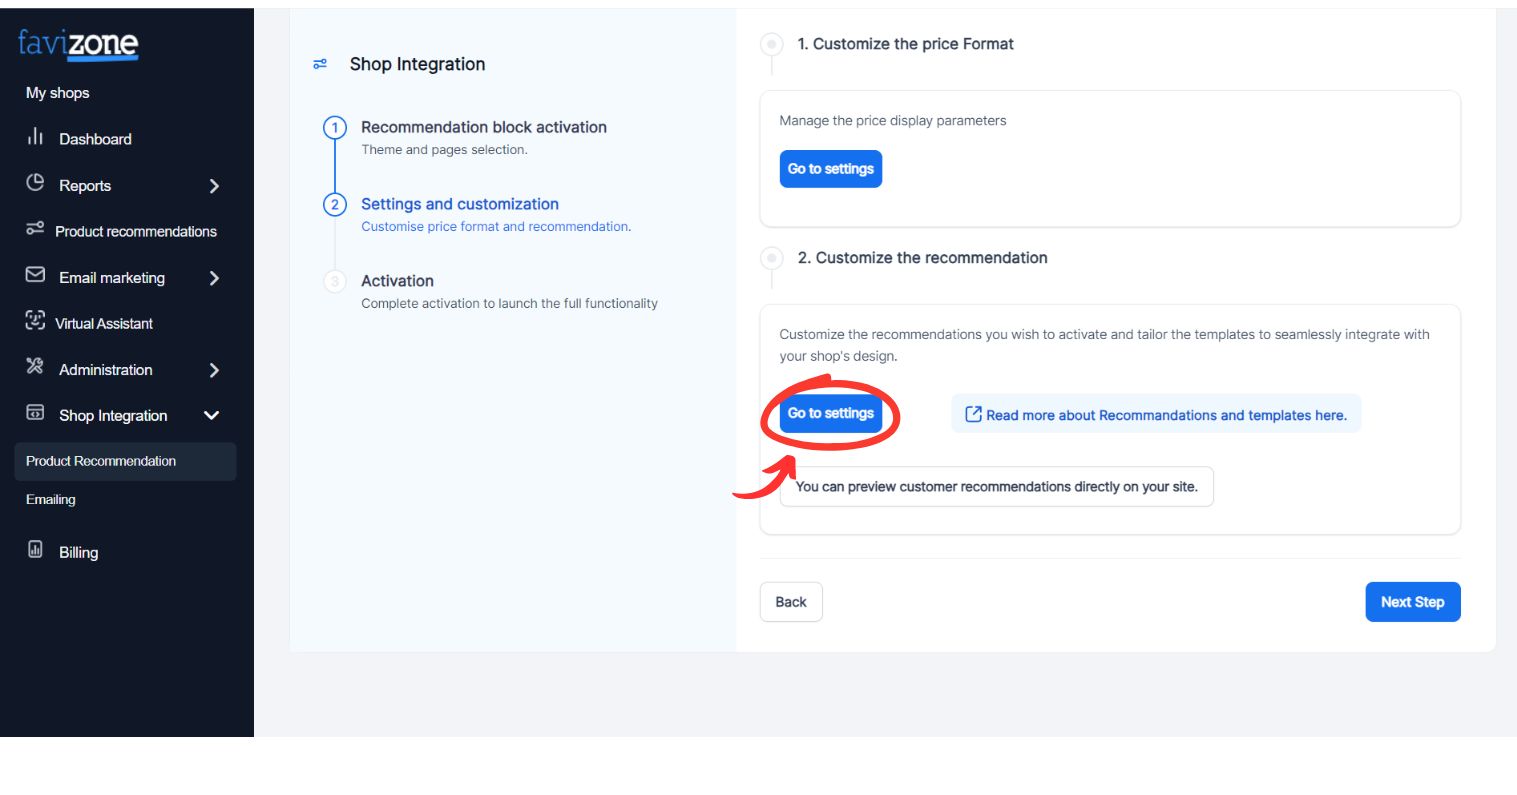
Don’t forget to “Save” your changes before you exit.
2.6 Post purchase Settings
The post-purchase page appears after the order is confirmed, but before the Thank you page.
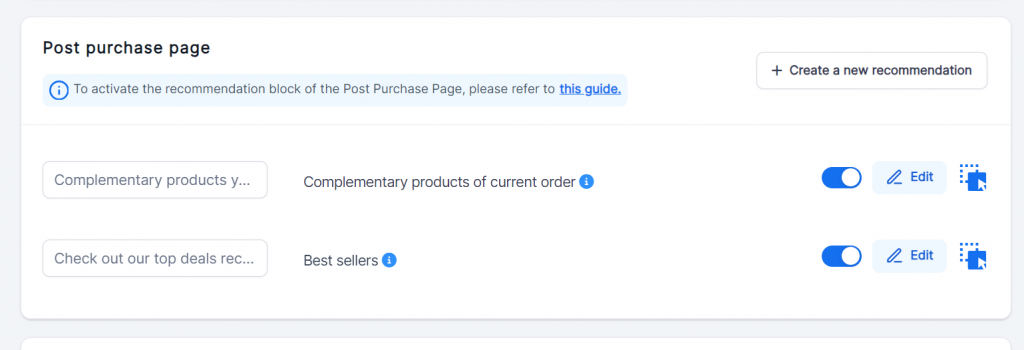
The following step is to activate recommendations on the post-purchase page once the recommendations have been saved.
Enabling recommendations on the post-purchase page is different from the other pages, as it allows Favizone to analyze the recently purchased products on your Shopify store and recommend similar or complementary items.
To activate the recommendation block on the post-purchase page, access Shopify settings, then click on “Checkout”.
Settings > Checkouts
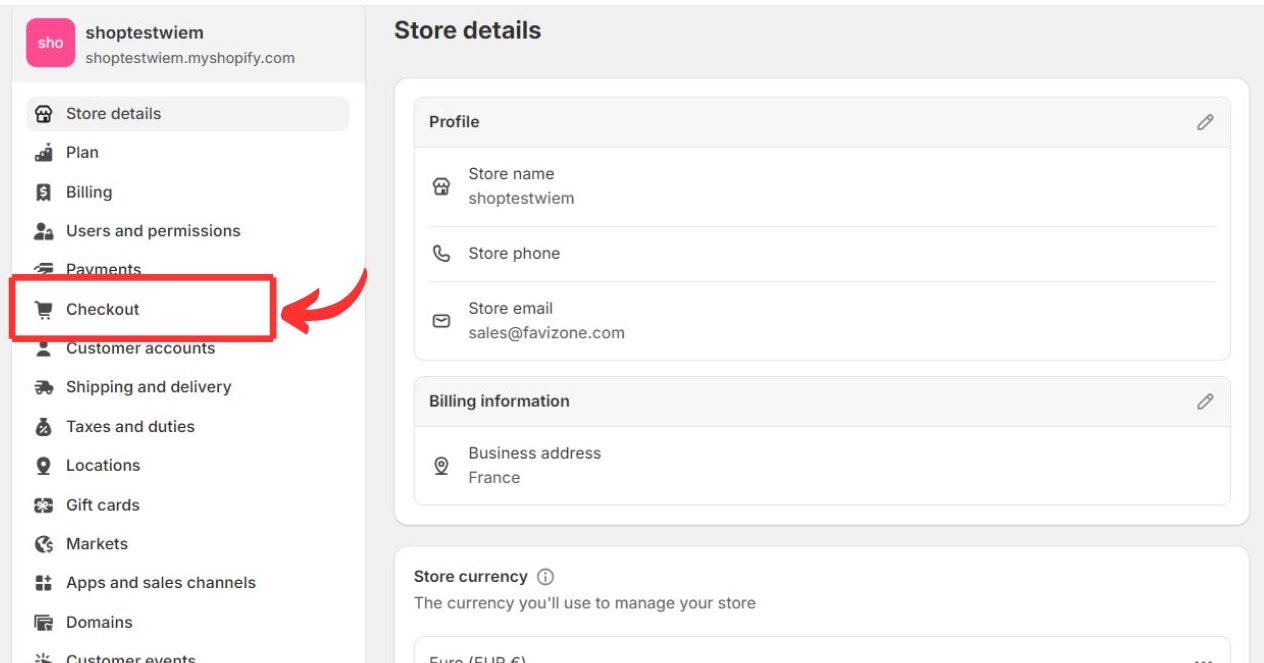
Next, scroll down to the “post-purchase page” section, where you can activate the Favizone upsell & cross-sell module.
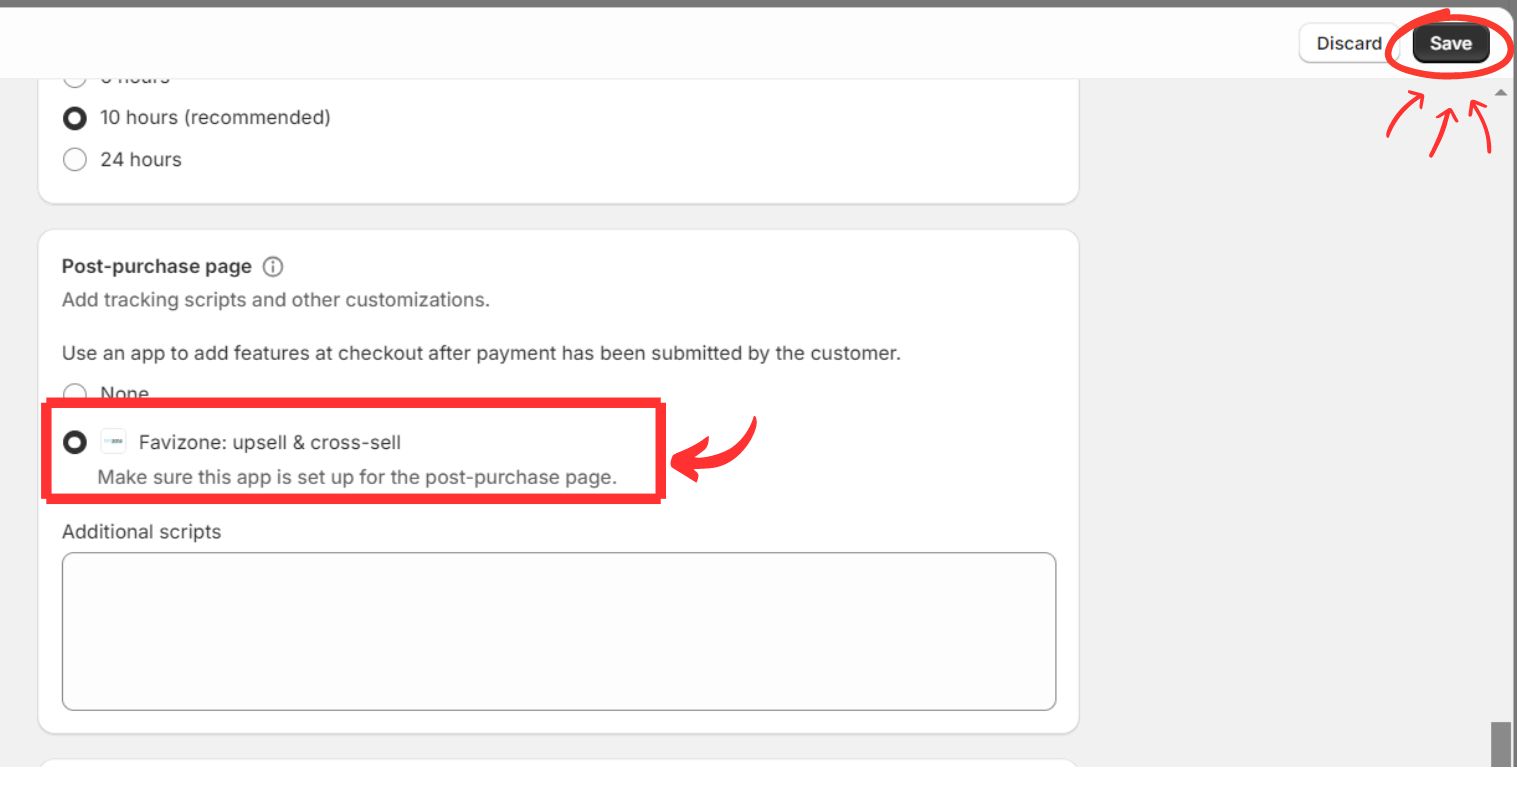
Don’t forget to “Save” your changes before you exit.
3. Enabling recommendations
At this stage, the Shopify side of the installation is done; now we have to go back and enable the recommendation from Favizone.
3.1 Connecting to Your Account
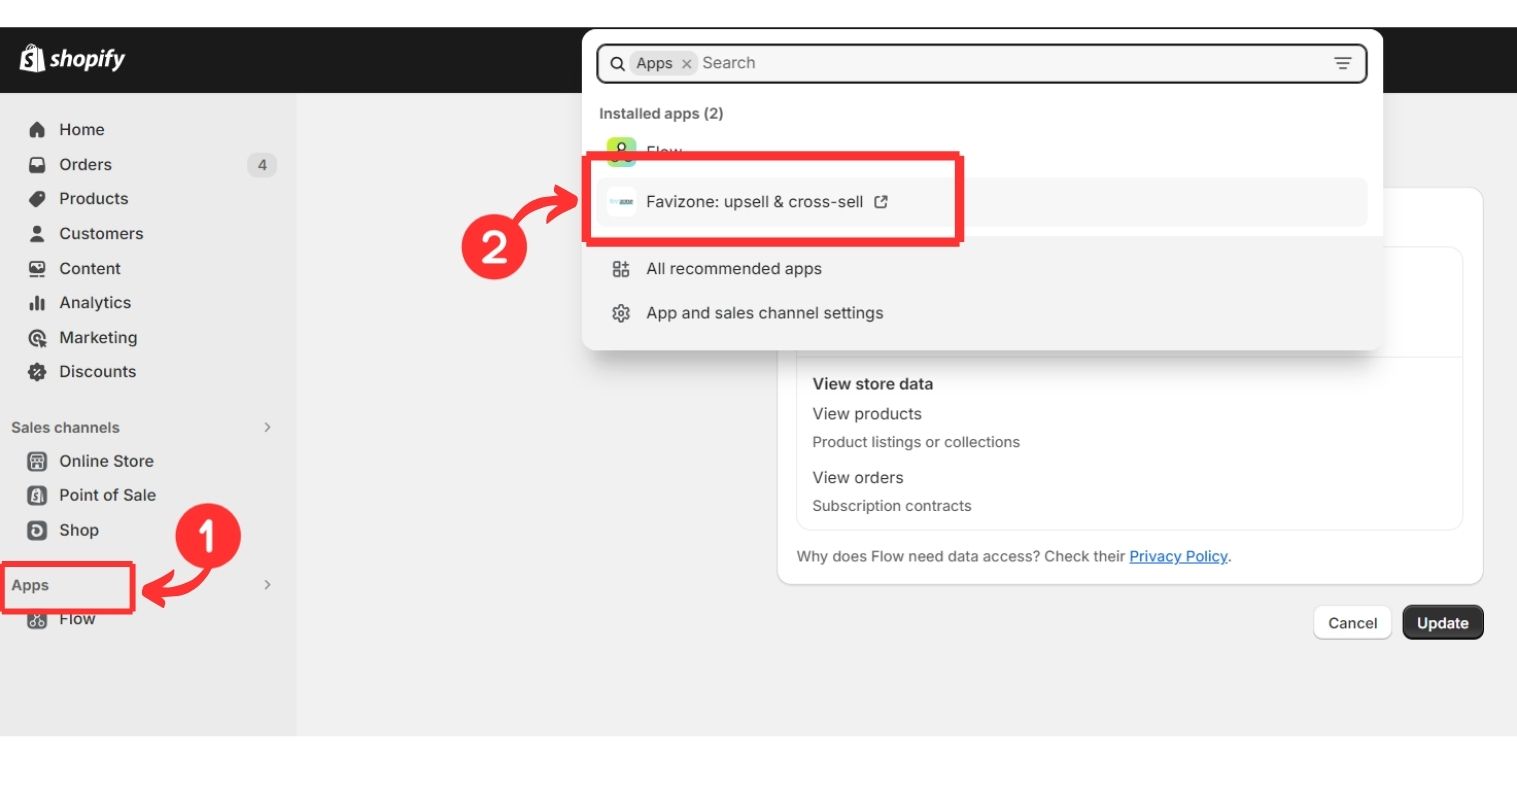
First, you just need to go to the Shopify back office, click on Apps, and then click on the module “Favizone: upsell & cross-sell,” and you’ll be directed to your Favizone Dashboard.”
Moving on to the next step to launch the full functionality of your shop
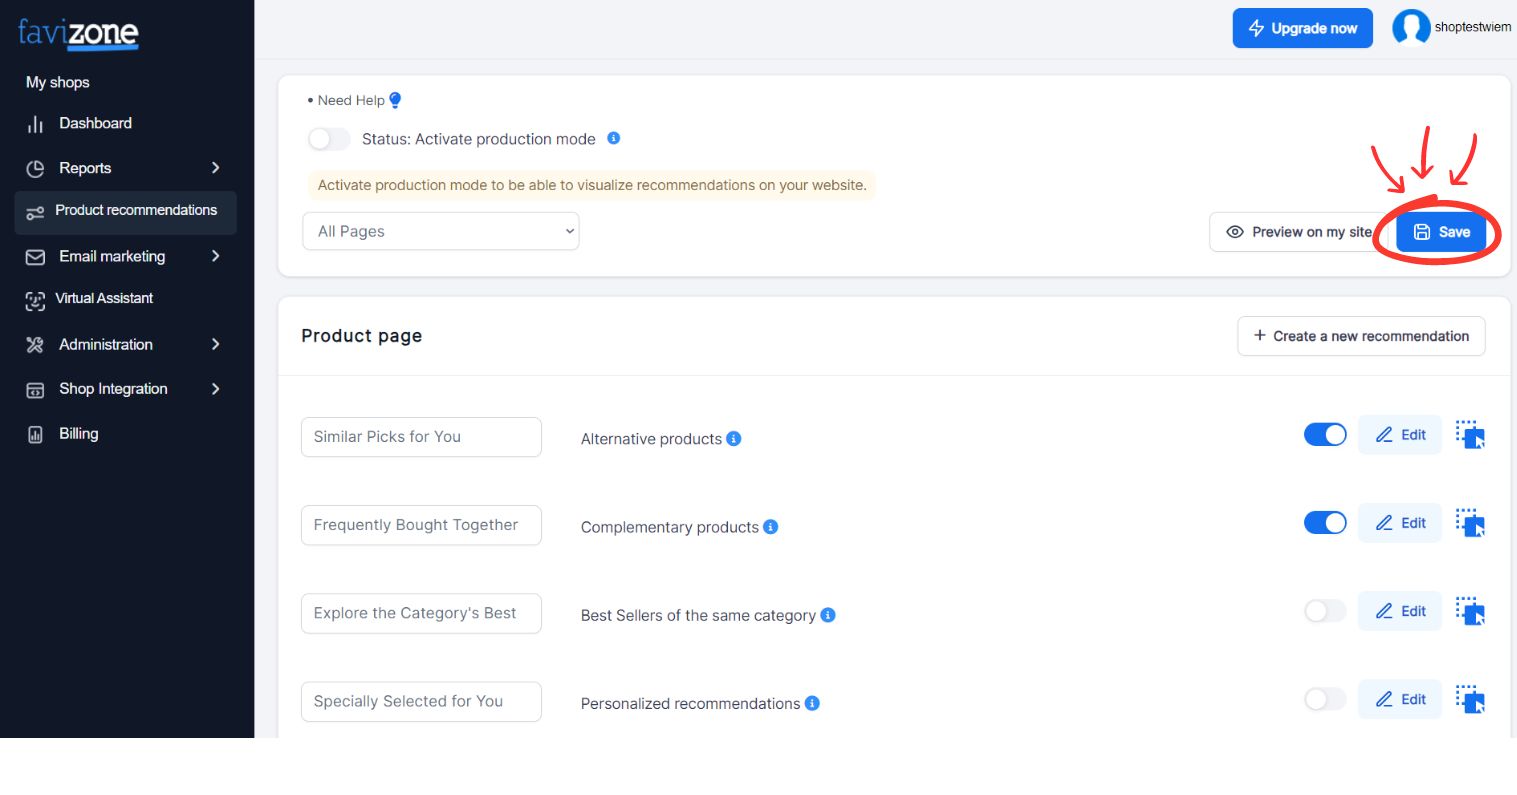
3.2 Activating Production Mode
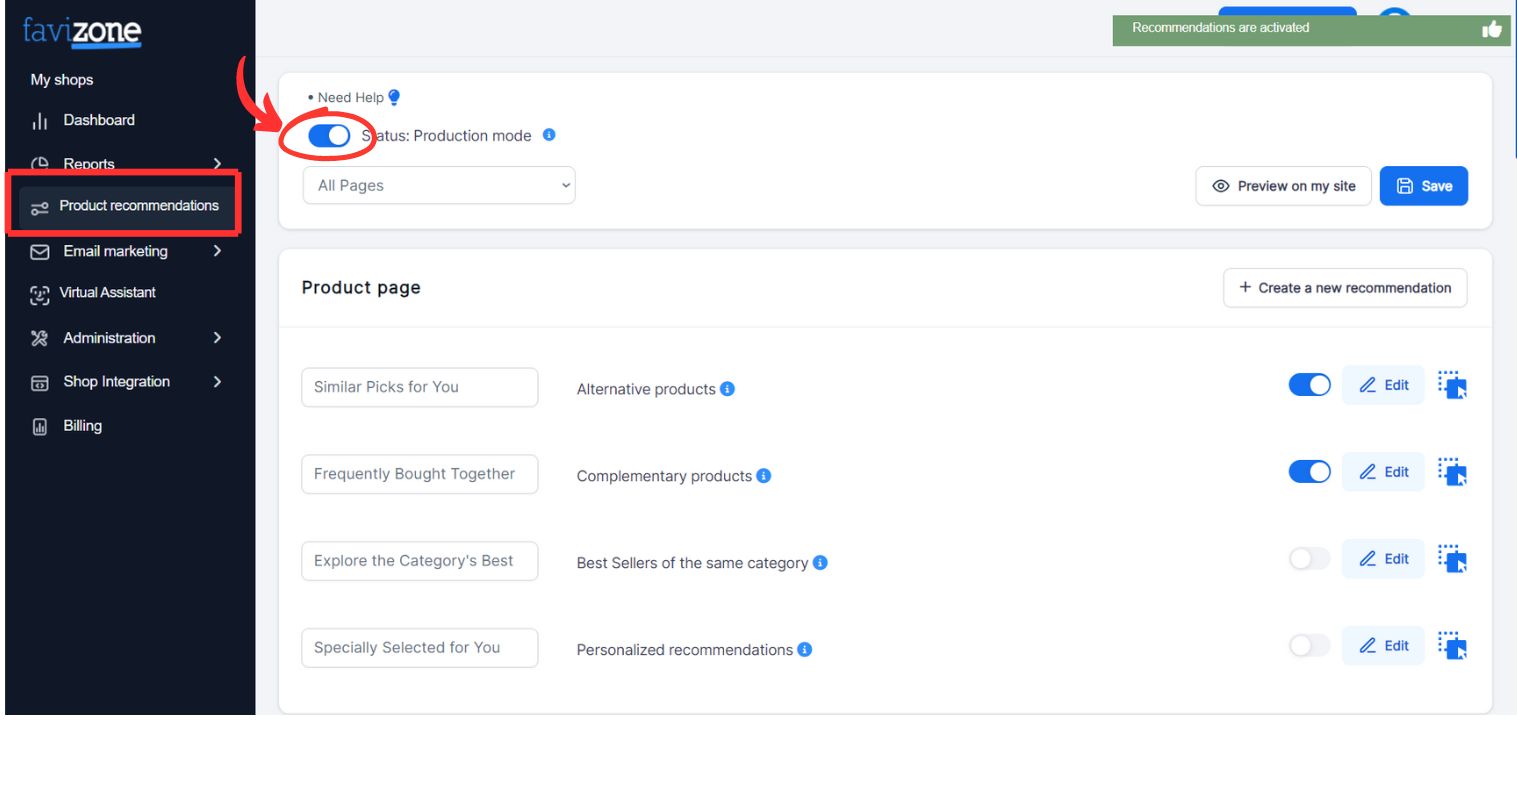
Next, click on “Product Recommendation”.
You can now activate “Production Mode” to launch the full functionality of your shop. This setup should work seamlessly and display basic recommendations on your website.
If you wish to customize the recommendations, you can follow this guide and come back to enable them later.
3.3 Preview
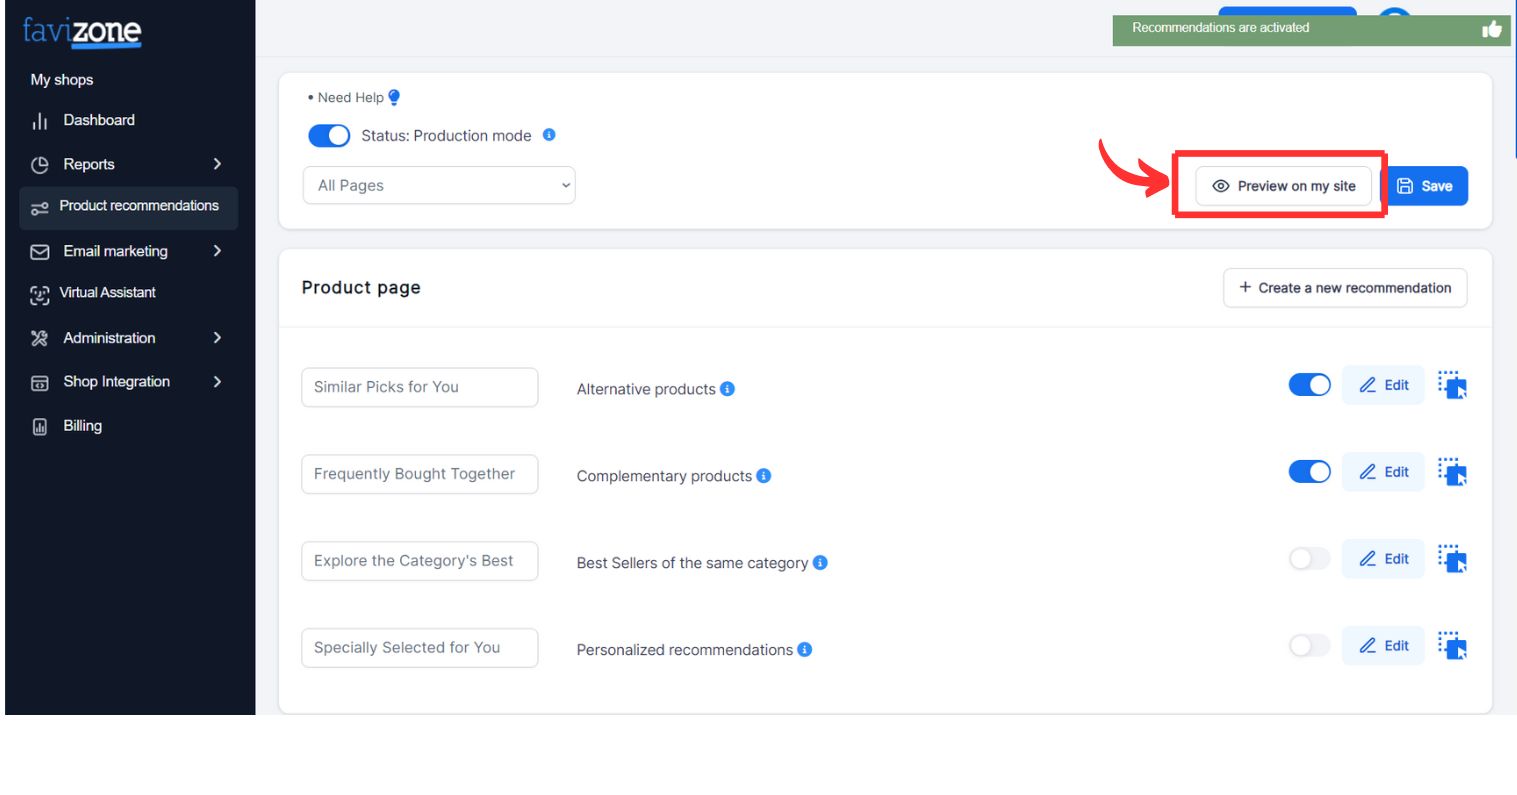
Before diving into the full implementation, you can take advantage of the preview mode. This feature allows you to see how the product recommendations will appear in your shop. Note that this preview is only visible to you. You can preview all pages except the post-purchase page on your website (see the next section).
You can customize your recommendations and test them before activating “Production Mode”.
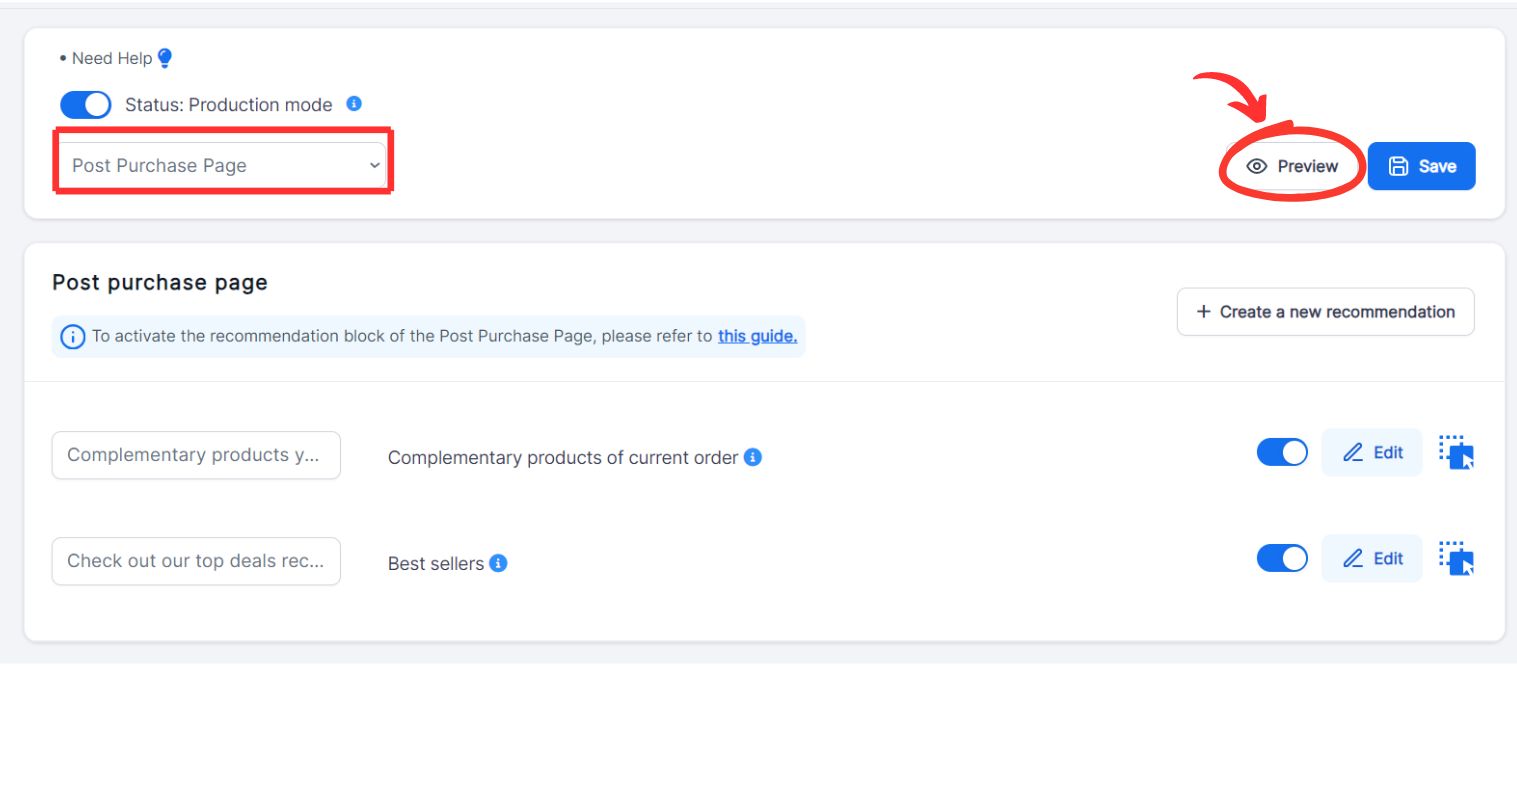
Preview of the Post-Purchase Page
While you can preview the recommendations on your post-purchase page, be aware that this preview won’t be on your website. To do this, simply click on “preview”, and it will lead you to the “Templates” page, where you can get an idea of how the recommendation block will appear.
Congratulations! You’ve successfully integrated Favizone Product Recommendations with your Shopify store, and you are now ready to start enjoying the benefits of Favizone’s AI-powered recommendations.
Check out how to configure the template to match your site with this guide