Let’s get started by following this guide
Once you’ve selected the Favizone Email Marketing solution for your website, the installation is a simple one-click step, and Shopify will redirect you to the standard module installation page.
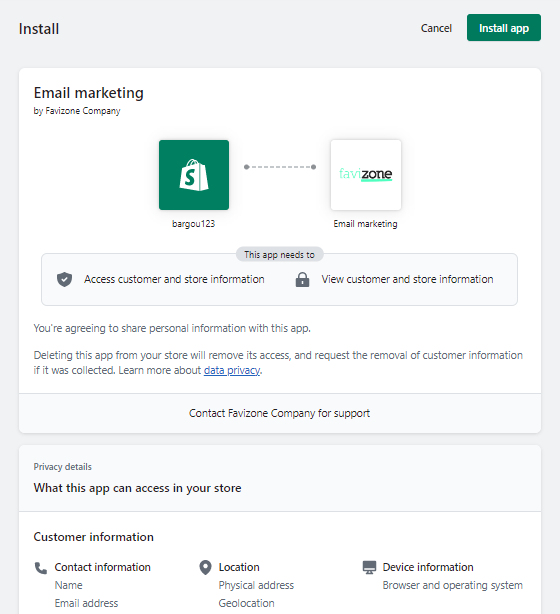
1.App Installation
To install the app, just click on the “Install unlisted app” button.
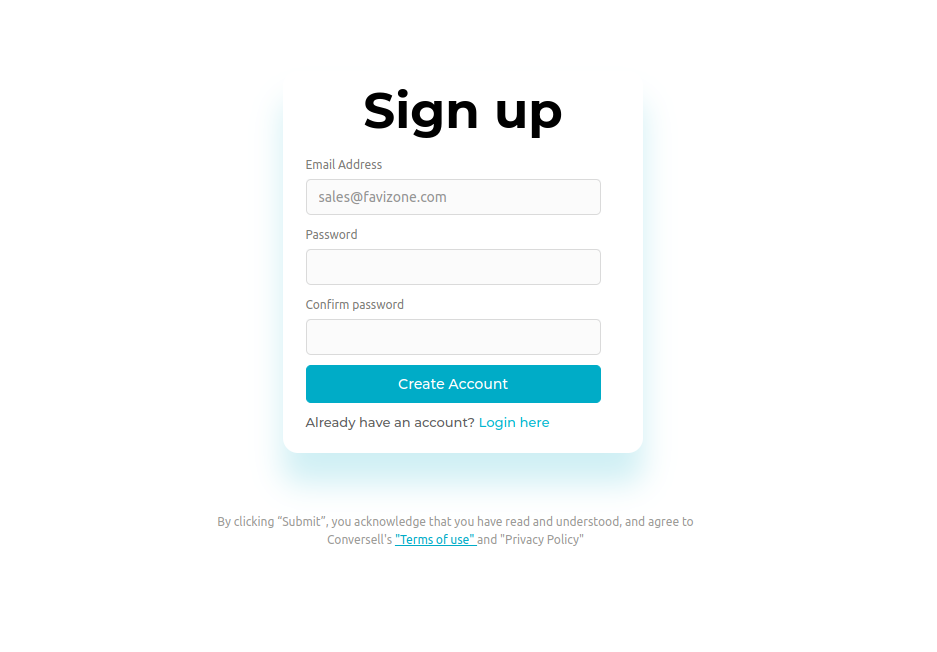
After the installation is complete, if you are not already a Favizone user, you will be directed to sign up for a new account. Fill in the required information.
You will be prompted to the payment plan page, where you can select a pricing strategy that suits your business needs and budget.
You can always start your free trial today and then upgrade later to keep enjoying the benefits of Favizone Email Marketing.

After selecting your plan, you should be redirected to Favizone, where you will find your dashboard in the left menu.
2. Email Marketing Configuration
Now that you have installed the Favizone Email Marketing module, there are additional modifications that need to be made to your Shopify store in order to integrate Email Marketing.
Explaining App Blocks and App Embed Blocks
Shopify introduced two powerful features: App Blocks and App Embed Blocks for enhanced store functionality and customization.
App Blocks are customizable content blocks used to enhance a Shopify store’s design and functionality without advanced coding skills. App Embed Blocks are custom applications integrated into the Shopify admin for streamlined workflows and personalized store functionality.
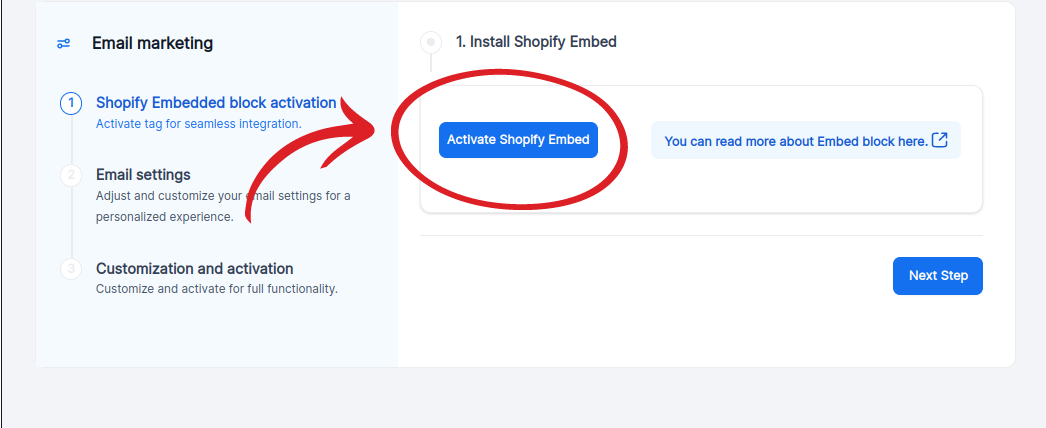
2.1 Activate Shopify Embed Block
After selecting your plan, you should find yourself on the “Shop Integration” page. Click on “Activate Shopify Embed.”
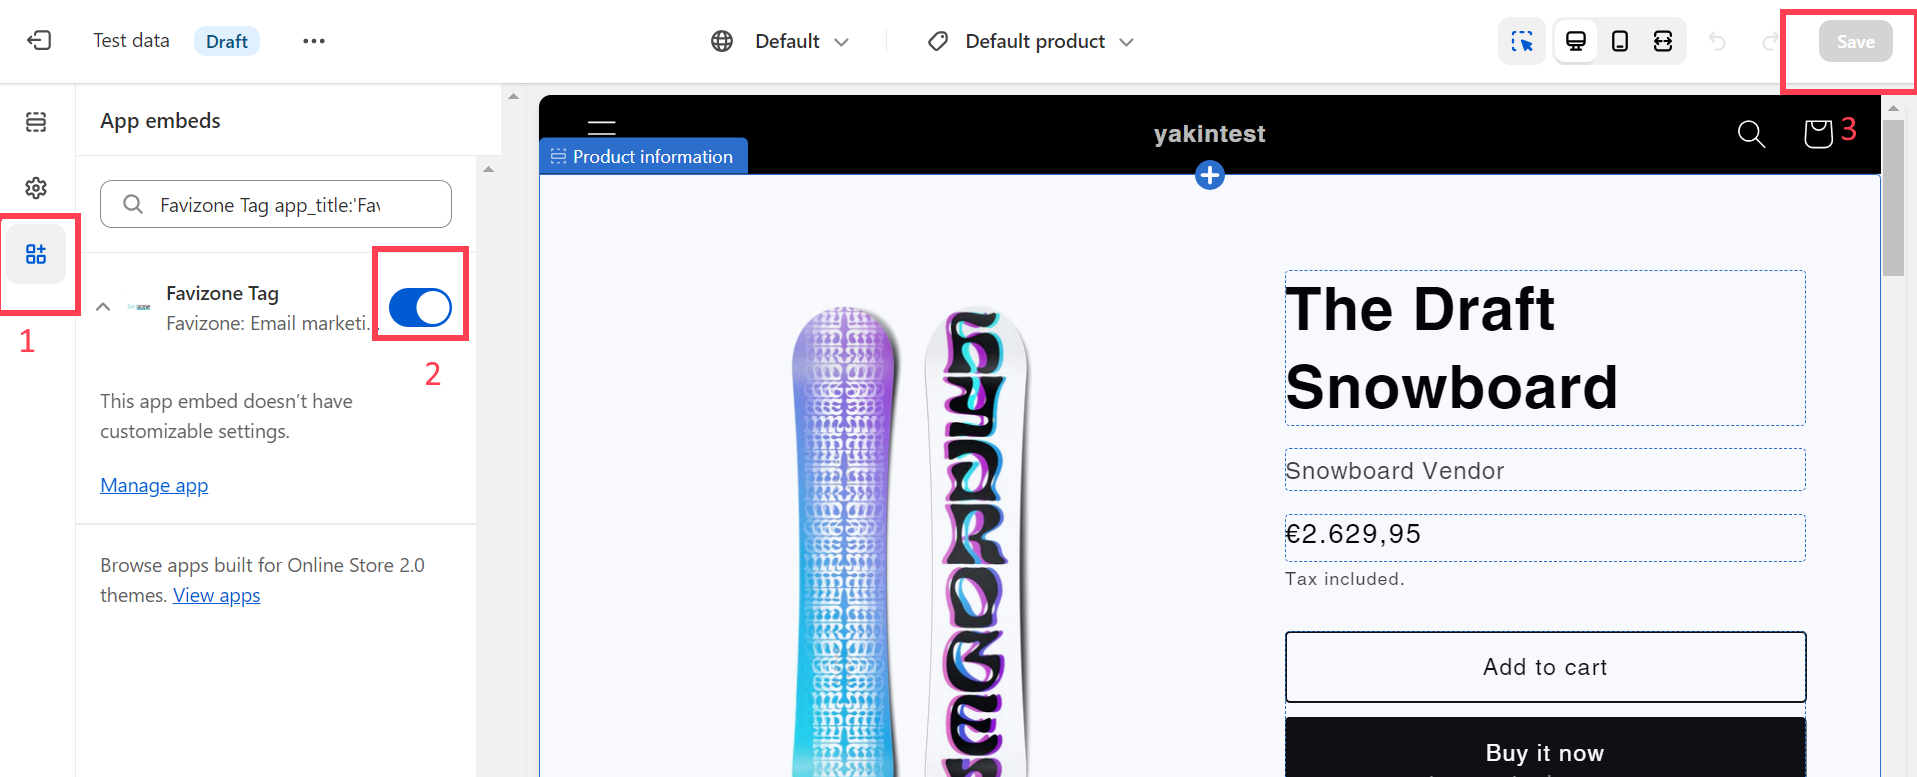
Make sure the Favizone tag is activated and save your changes.
2.2 Settings and Customization
2.2.1 General Settings
In this step, we will configure settings and customization in order to make personalized emails for your shop.
Click “Go to Settings,” and you’ll access the Email Settings page, allowing you to configure the global settings for all the emails you are going to send from Favizone.

This page contains essential global settings you should adjust before sending any emails.
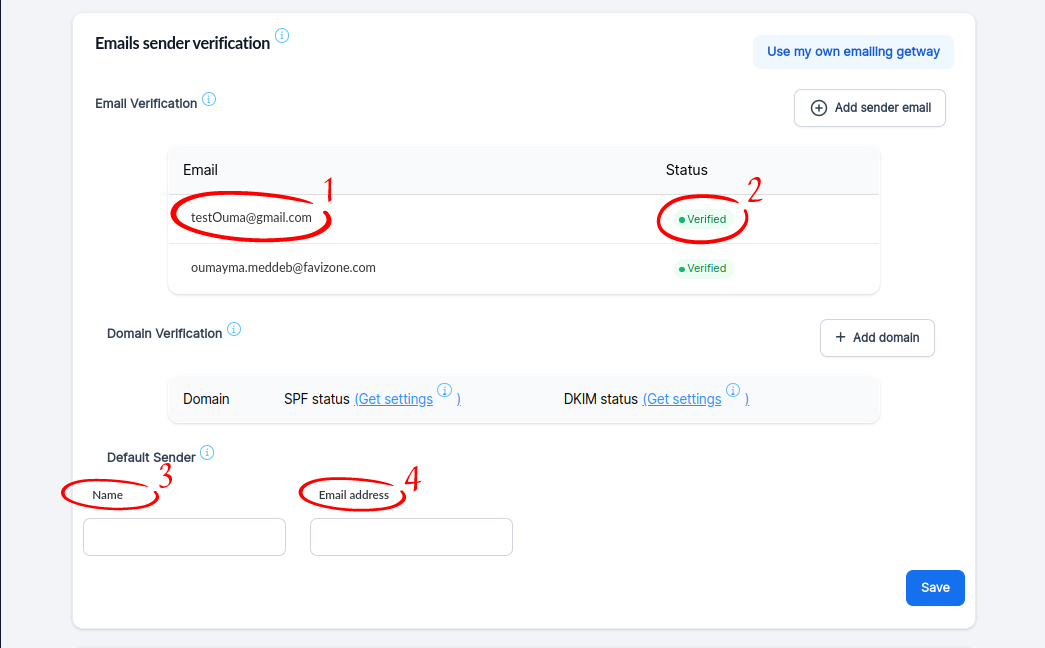
One crucial setting is ‘Email Sender Verification,’ which must be accurately filled out for correct email delivery.
- Your primary email, used during Favizone account creation, serves as the default sender email. You can later add more emails or domains.
- The verification badge will appear once you click on the verification button that you should’ve gotten by email once you created a Favizone account.
- The ‘name’ here is what your clients will see as the sender’s name in their email. Consider changing it to match your shop’s name.
- The ’email address’ is where your clients will receive emails from, for example, ‘sales@favizone.com.
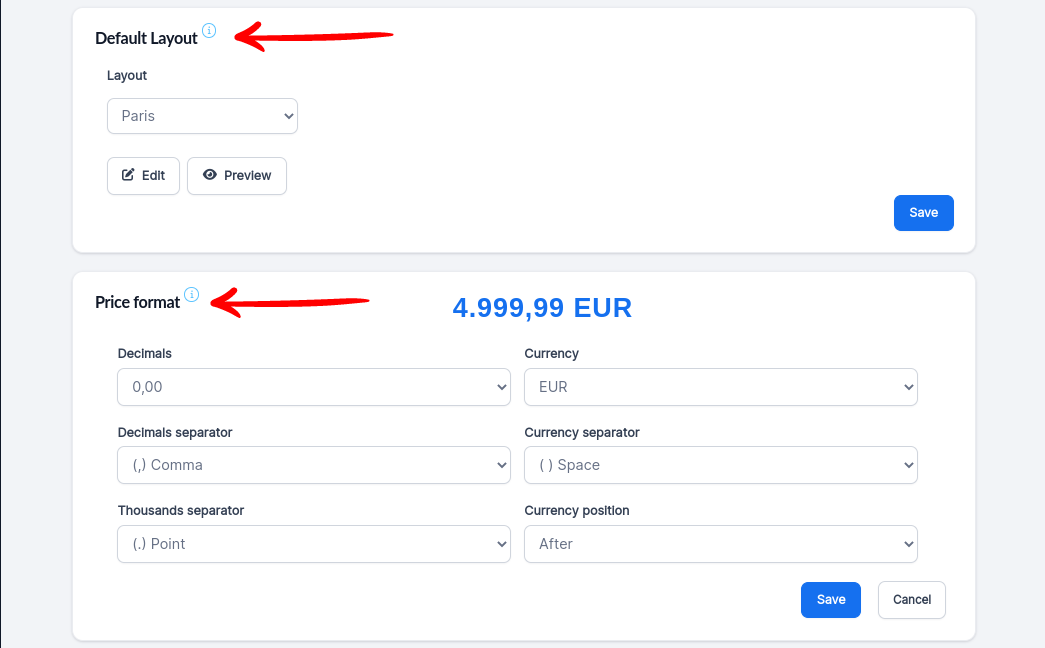
Default Layout: In this section, you can choose from a variety of email layouts as your default option. You also have the option to customize and preview your selected layout.
Price Format is the section where you can configure the default price configuration, where you can configure the price format to match your shop, the currency, decimals, currency position, and more.
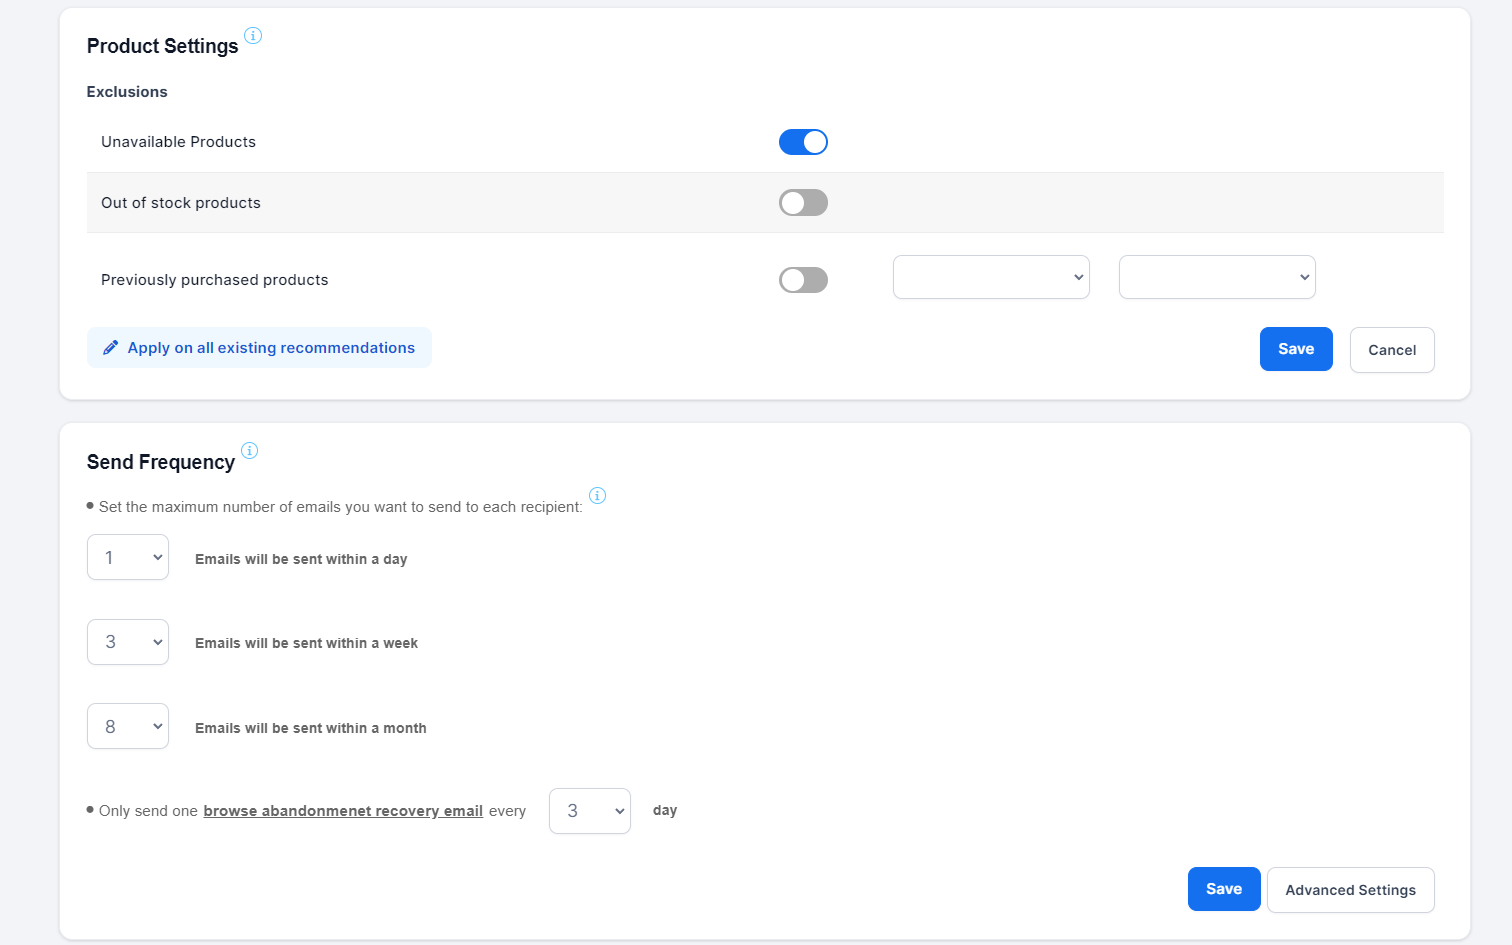
Product Settings is the section where you can exclude a specific group of your products.
Send Frequency is the section where you can adjust the maximum email limit for each recipient per period.
This should wrap up the customization settings.
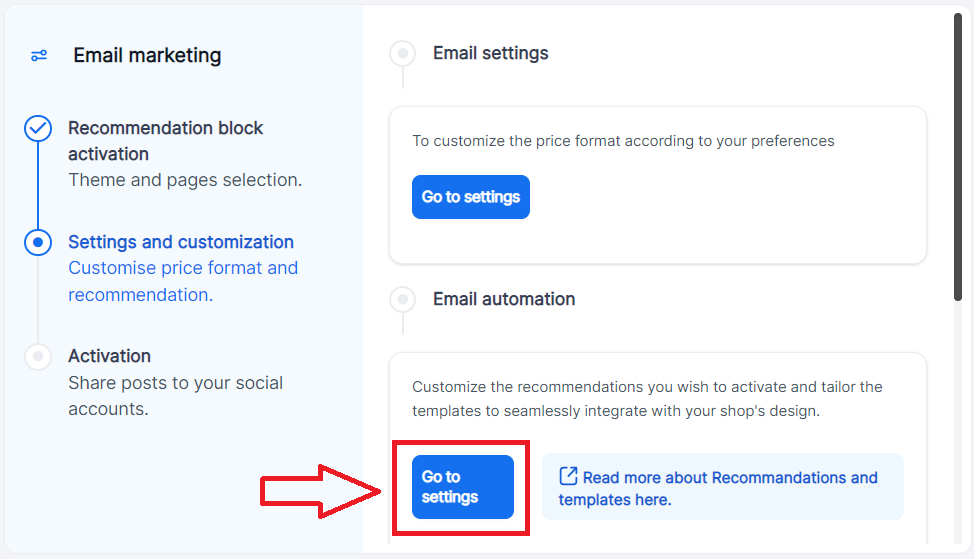
Now let’s go back to the integration page to configure email automation.
2.2.2 Email Automation Settings
This is where you can configure all the automations, one by one. We have created a few automations, but you can create, modify, and delete automations based on your needs.
You should be redirected to this page. This automation is Cart abandonment recovery its an automation that will send automated emails to clients who abandoned their cart.
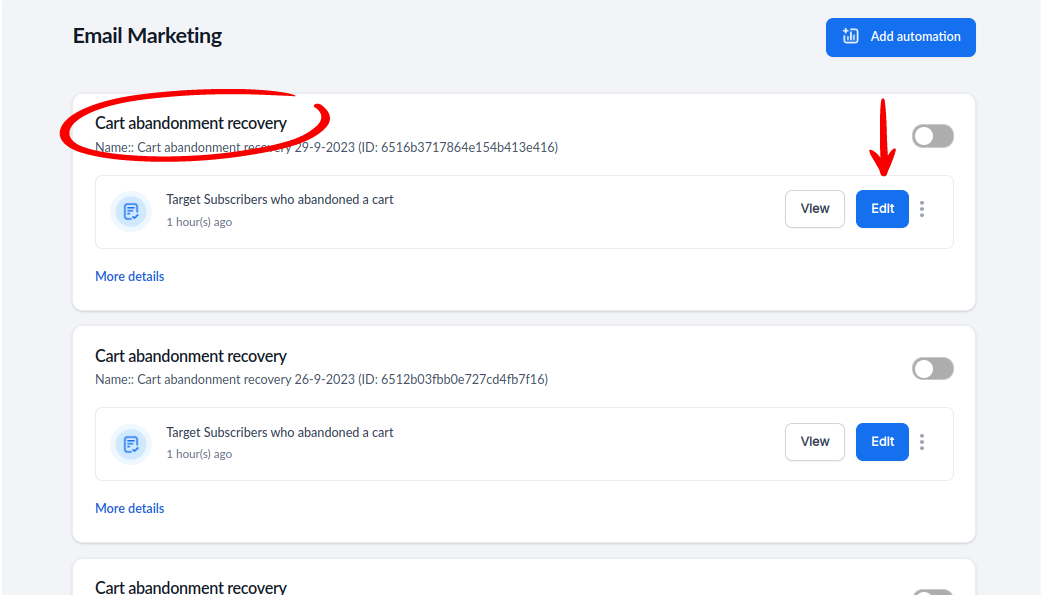
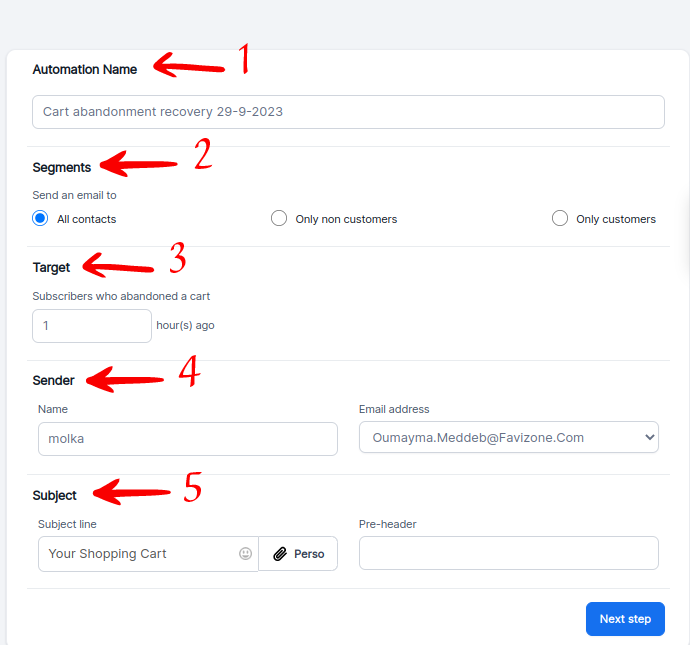
After clicking edit, you should be redirected to this page:
- Automation Name: the name of the automation.
- Segments: select the segment that you want your automated email to target.
- Target: This is the target audience; you can control the delay after which the customer will get an automated email.
- Sender name: this is the name the client will receive in there automated email.
- Sender Email Address: This is the email address the client will receive in there automated email.
- Subject: is the subject and the pre-header to the email the client will receive.
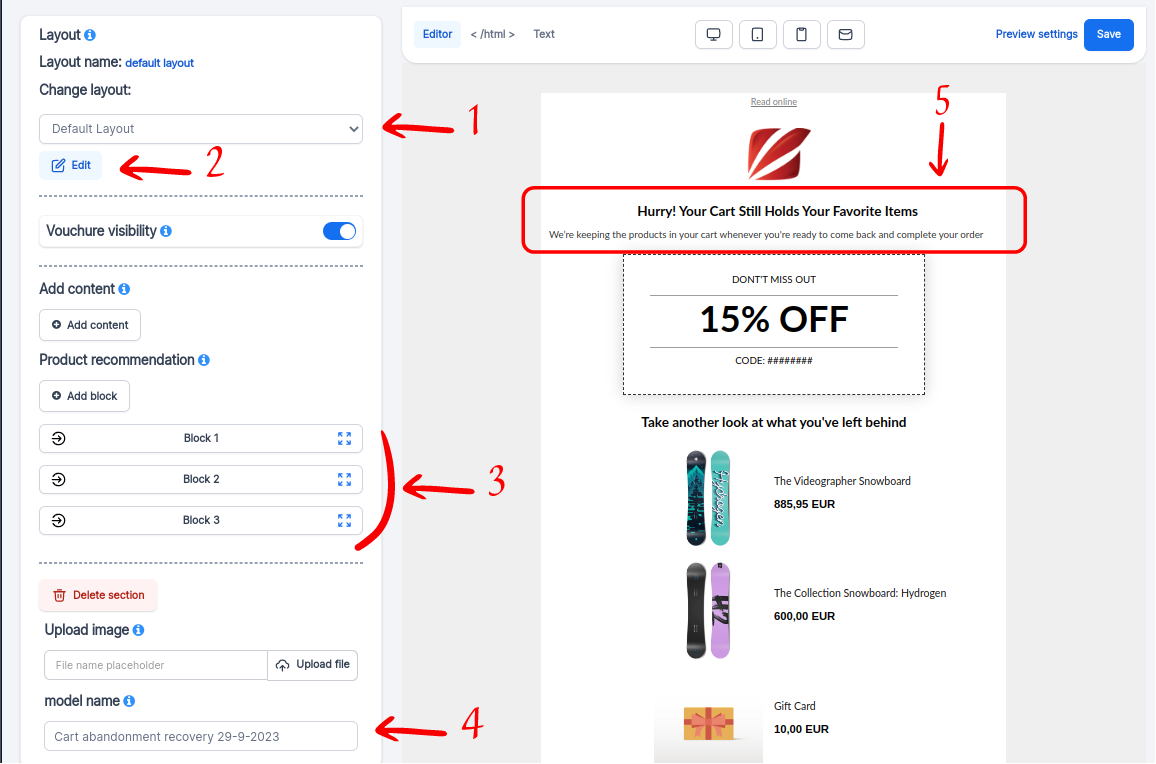
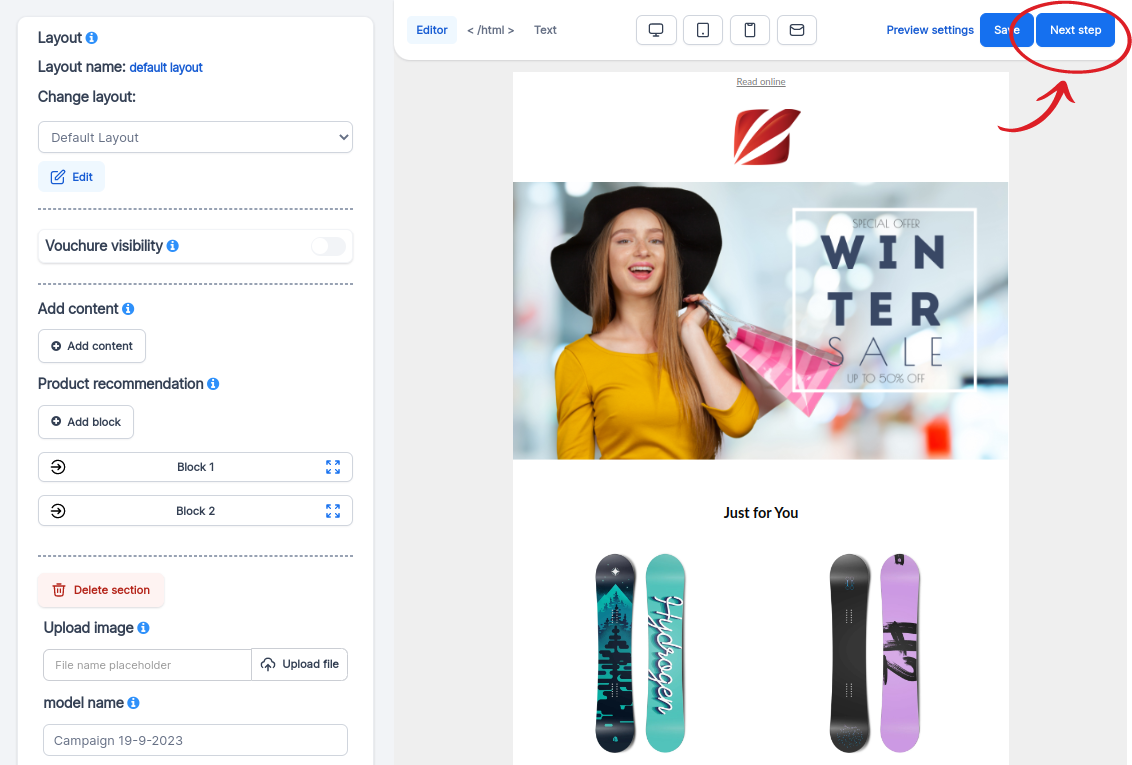
After clicking “next step,” you should find yourself on this page:
- With this button, you can change the layout.
- You can edit the layout with the number 2 option.
- Product recommendations are divided into blocks. Each block will render its own product with its own AI recommendations.
- Model name: is the distinctive name of this particular email automation.
- In this box, you can write the content of the email to entice the customers to make a purchase. You can offer vouchers to your customers as well.
Don’t forget to save your changes in the top-right corner.
2.2.3 Email Campaign Settings
Now, you can customize your email campaigns.
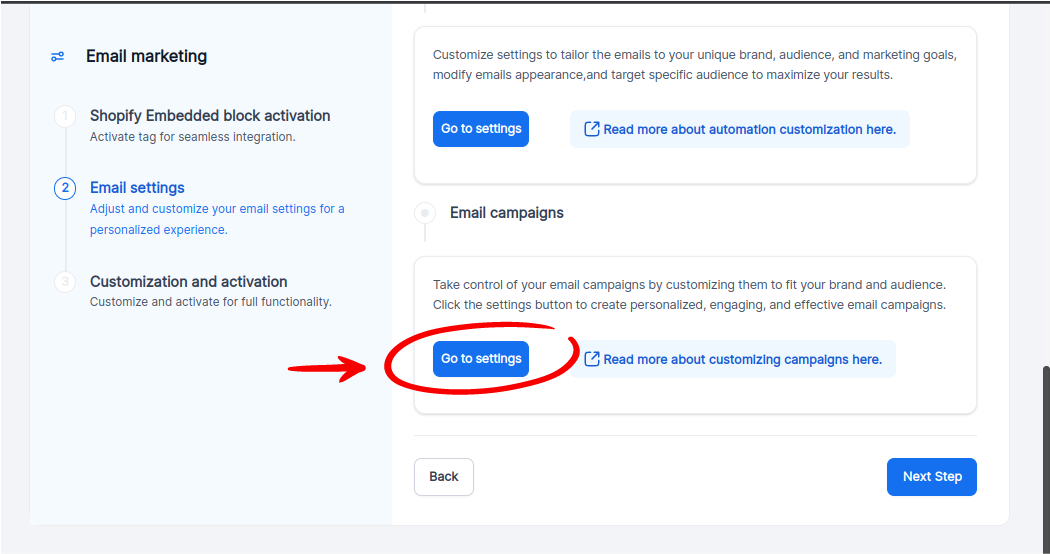
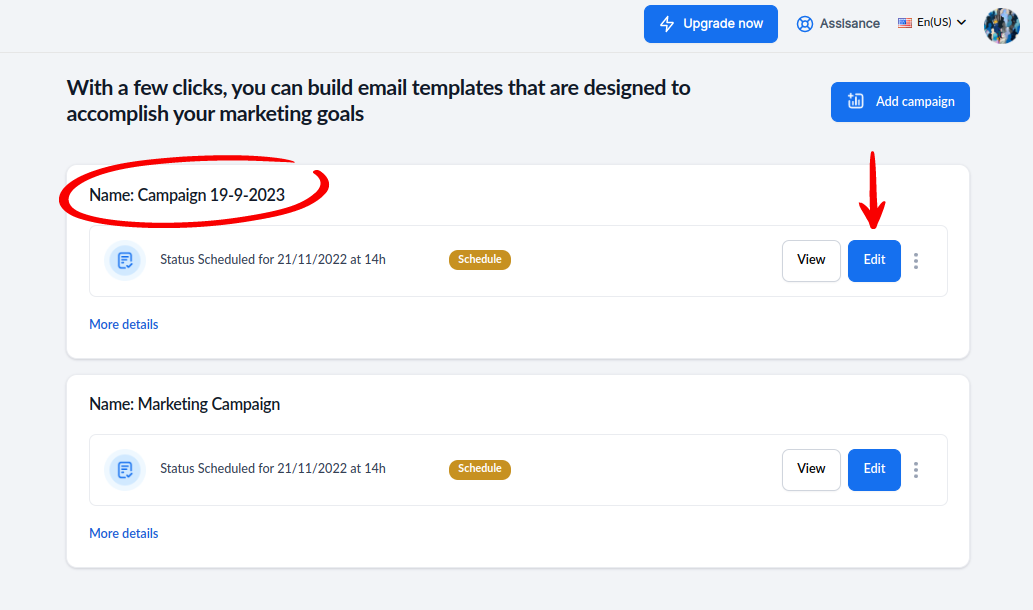
After clicking “Go to Settings,” you will be directed to this page. Click “edit” to customize your campaign. You can add new ones if you want.
The next steps are exactly the same as email automation.
After you finish customizing your email campaign text and layout, you can move on to the next step.
Here, you have two options: you can schedule campaigns or send them instantly.
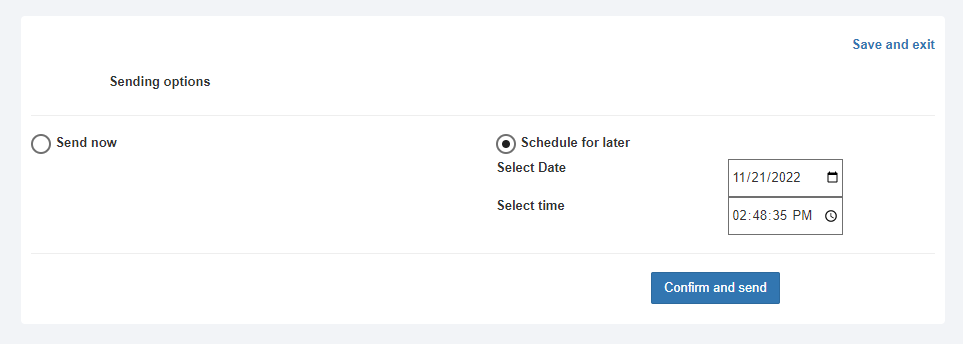
Select which option you like and save.
2.3 Activation
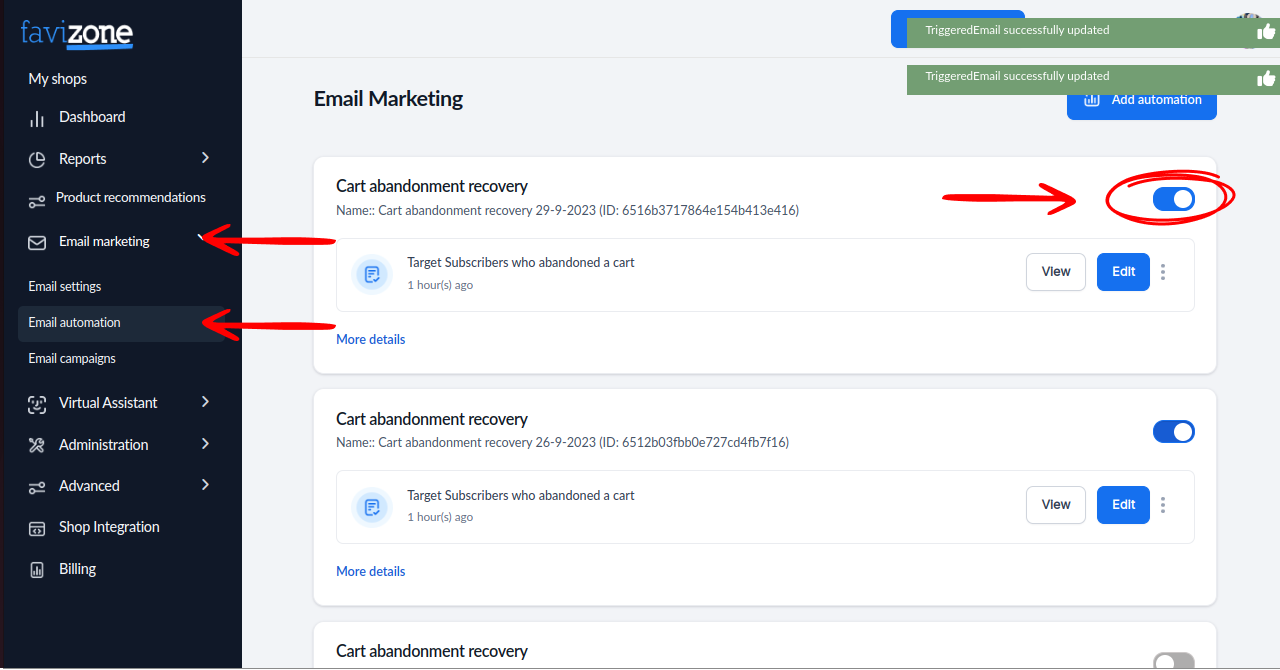
In the last step, activate your email automations so the algorithms can start generating tailored emails for each client.
Navigate to Email Marketing > Marketing Automation. Activate any automation you prefer.
Congratulations! Your Favizone Email Marketing is now set up and ready to boost your email marketing efforts.